5.4 Preview & Validation
Overview
Before assigning a practice test to your students, EdisonOS lets you preview the test exactly as a student would experience it including the full interface, adaptive section flow, question tools, and a sample results report. This is your quality check. Use it to make sure the test looks right, the questions are in order, and the tools work as intended before anyone sits down to take it.
Preview is available for any practice test, whether it lives in My Library (your own tests) or the EdisonOS Library (pre-built content).
Step 1 - Open the Practice Test
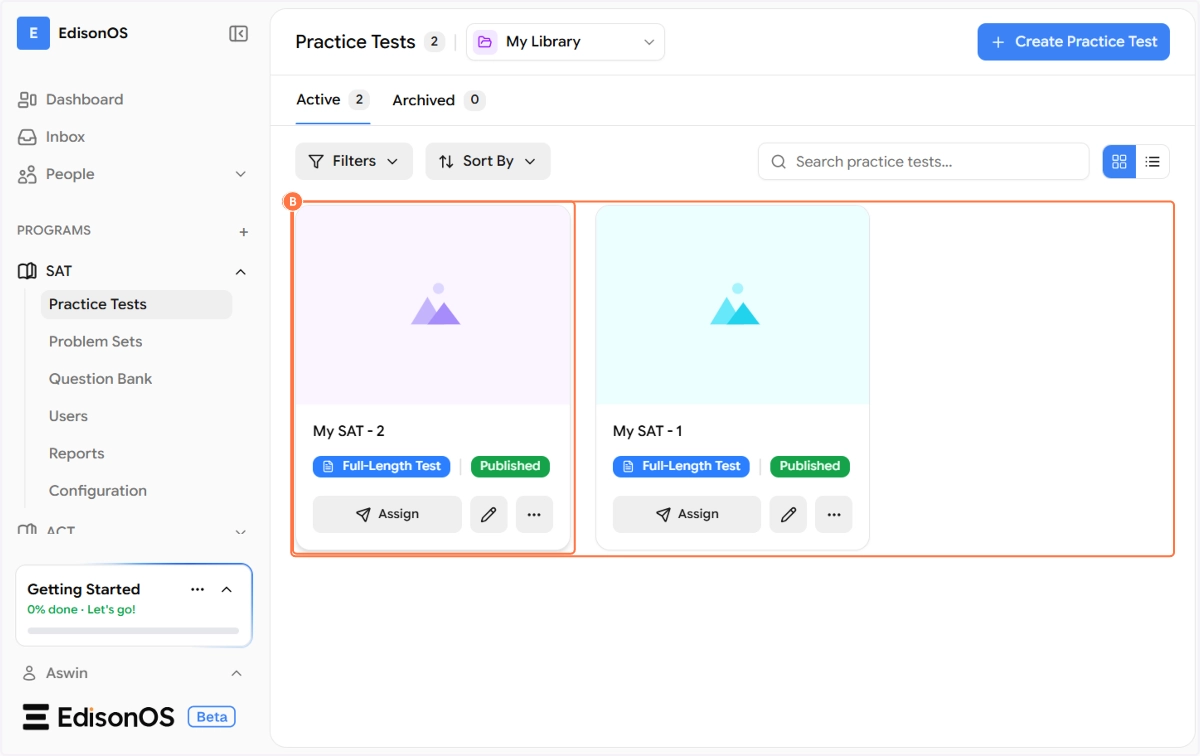
Navigate to your program (e.g., SAT) in the left sidebar and click on Practice Tests. You'll see all your tests listed as cards under My Library.
Click on the test card you want to preview to open the test's detail view.
Step 2 - Launch the Preview
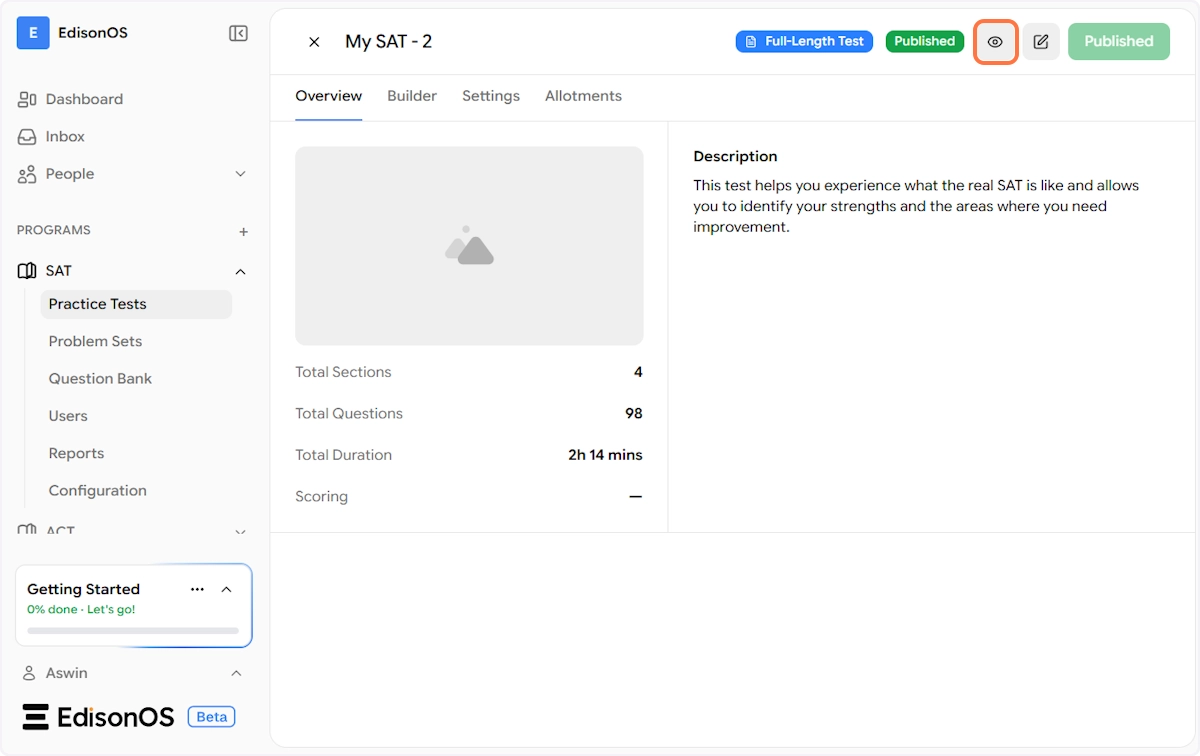
Once the test detail page opens, you'll see the test's Overview tab, which shows the total sections, questions, duration, and description. In the top-right area of the page, you'll find an eye icon (👁) next to the edit and publish buttons.
Click the eye icon to launch the preview.
A full-screen preview screen will load with a clear message: "You're about to preview this Practice Test." This screen outlines exactly what the preview mode means so you know what to expect:
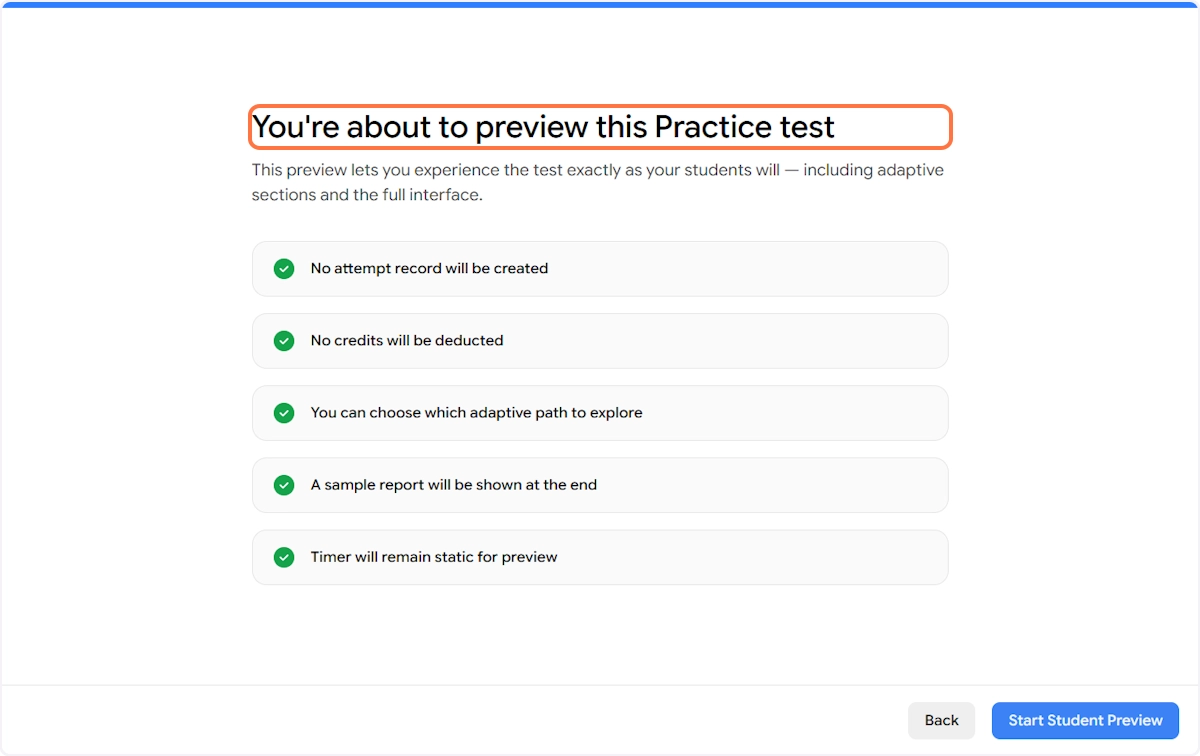
No attempt record will be created - The preview won't appear in any student's history or your reports.
No credits will be deducted - Running a preview doesn't consume any of your plan's credits.
You can choose which adaptive path to explore - Since this is a preview, you won't be locked into the adaptive routing. You can manually select whether to go down the Upper or Lower adaptive path, giving you visibility into both versions of the test.
A sample report will be shown at the end - Once you complete the preview, a simulated results report is generated so you can see exactly what your students will see after submitting.
Timer will remain static for preview - The countdown timer is frozen during preview mode so you can take as much time as you need to review each question without pressure.
Click Start Student Preview to continue.
Step 3 - System Check & Test Overview
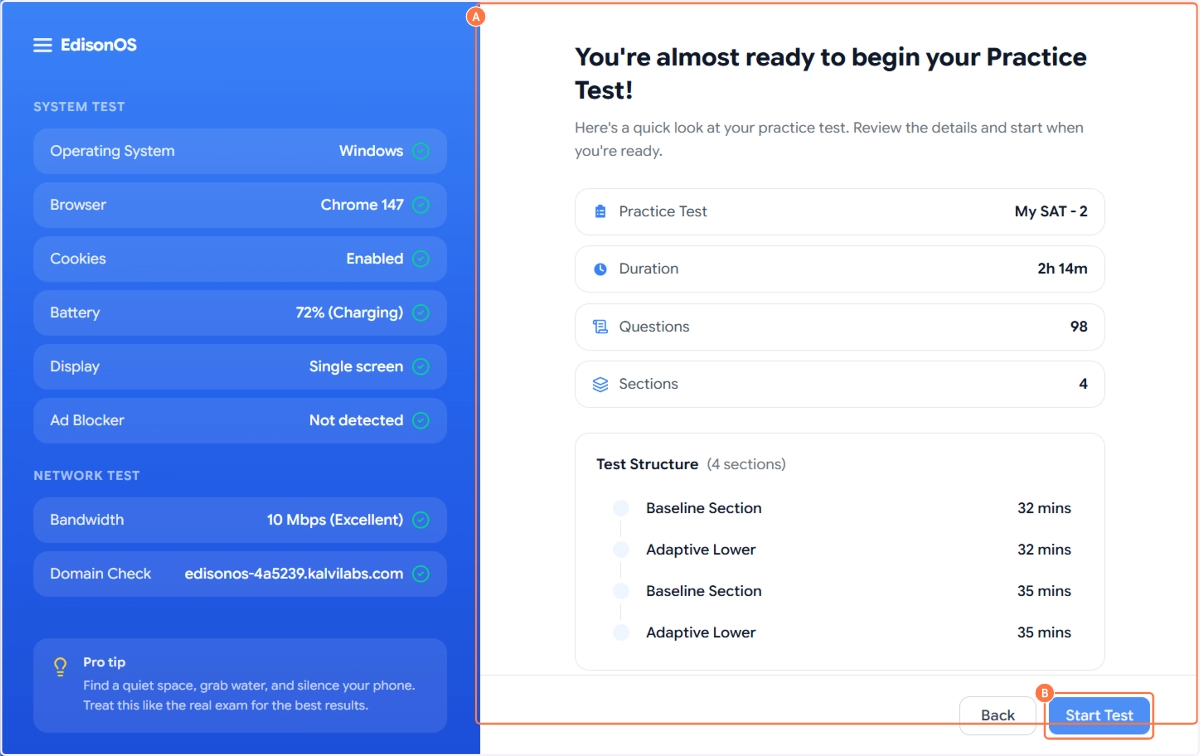
Before the test begins, EdisonOS runs a quick system and network check on the left side of the screen. This mirrors what students see when they launch the test and ensures their device and connection meet the requirements for a smooth testing experience.
The system check covers:
Operating System - Detects the student's OS (e.g., Windows, macOS)
Browser - Confirms a supported browser is in use (e.g., Chrome 147)
Cookies - Verifies cookies are enabled, which are required for session tracking
Battery - Displays the current battery level and charging status
Display - Checks for single or multi-screen setup
Ad Blocker - Flags if an ad blocker is detected, which may interfere with the test
The Network Test confirms:
Bandwidth - Tests internet speed (e.g., 10 Mbps, rated as Excellent)
Domain Check - Verifies the EdisonOS domain is accessible from the student's network
A Pro Tip is shown at the bottom of the system check panel as a friendly reminder: "Find a quiet space, grab water, and silence your phone. Treat this like the real exam for the best results."
On the right side of the screen, a test summary is displayed before starting:
Detail | Value |
|---|---|
Practice Test | My SAT - 2 |
Duration | 2h 14m |
Questions | 98 |
Sections | 4 |
The Test Structure is listed below, showing each section and its time allocation — for example, Baseline Section (32 mins), Adaptive Lower (32 mins), Math Baseline (35 mins), and Adaptive Lower Math (35 mins).
When you're satisfied with the system check results and have reviewed the test details, click Start Test to enter the actual preview.
Step 4 - The Student Test Experience
This is where EdisonOS truly shines. The student test interface is purpose-built to replicate the experience of sitting a real digital exam. For SAT practice tests, the interface is designed to closely mirror the look and feel of the College Board's Bluebook app — the official digital SAT platform. Similarly, ACT practice tests and other standardized program tests in EdisonOS are built to replicate the official interface of those respective exams. Students arrive on test day already familiar with the layout, reducing anxiety and improving performance.
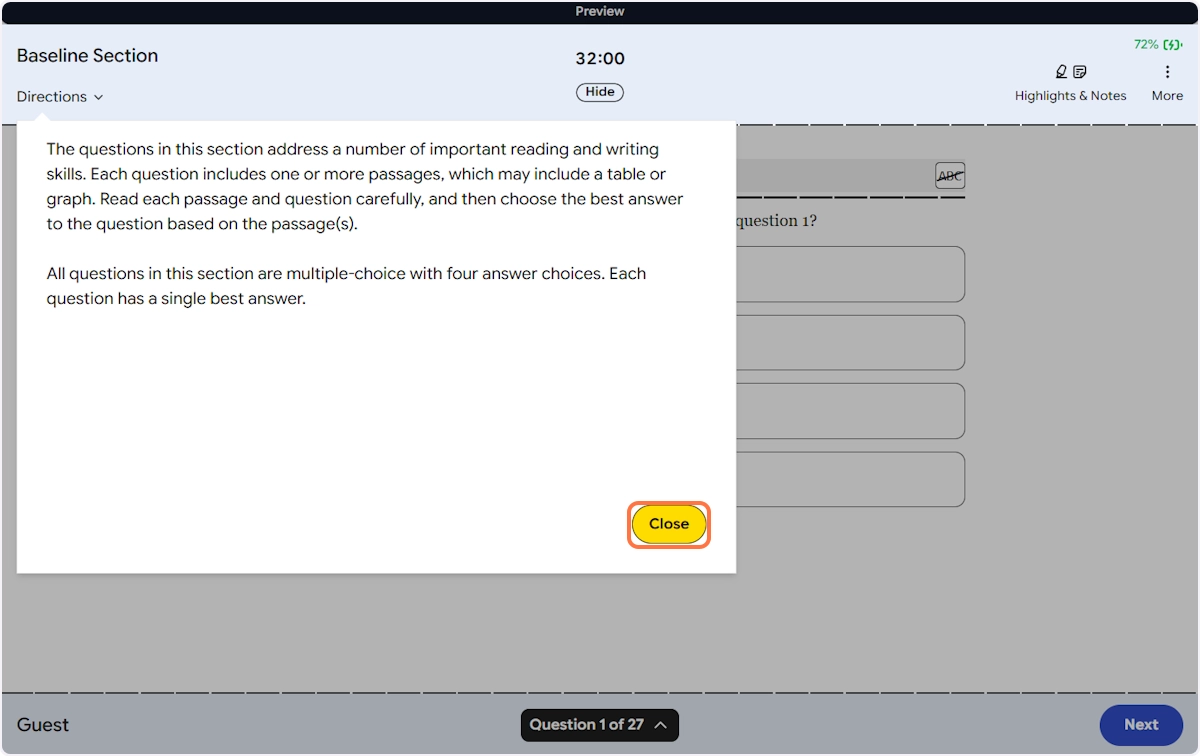
When a section begins, students first see a Directions panel that slides over the question screen. This displays the section instructions for example, for Reading & Writing: "The questions in this section address a number of important reading and writing skills. Each question includes one or more passages, which may include a table or graph. Read each passage and question carefully, and then choose the best answer to the question based on the passage(s)." Students click Close to dismiss the directions and begin answering.
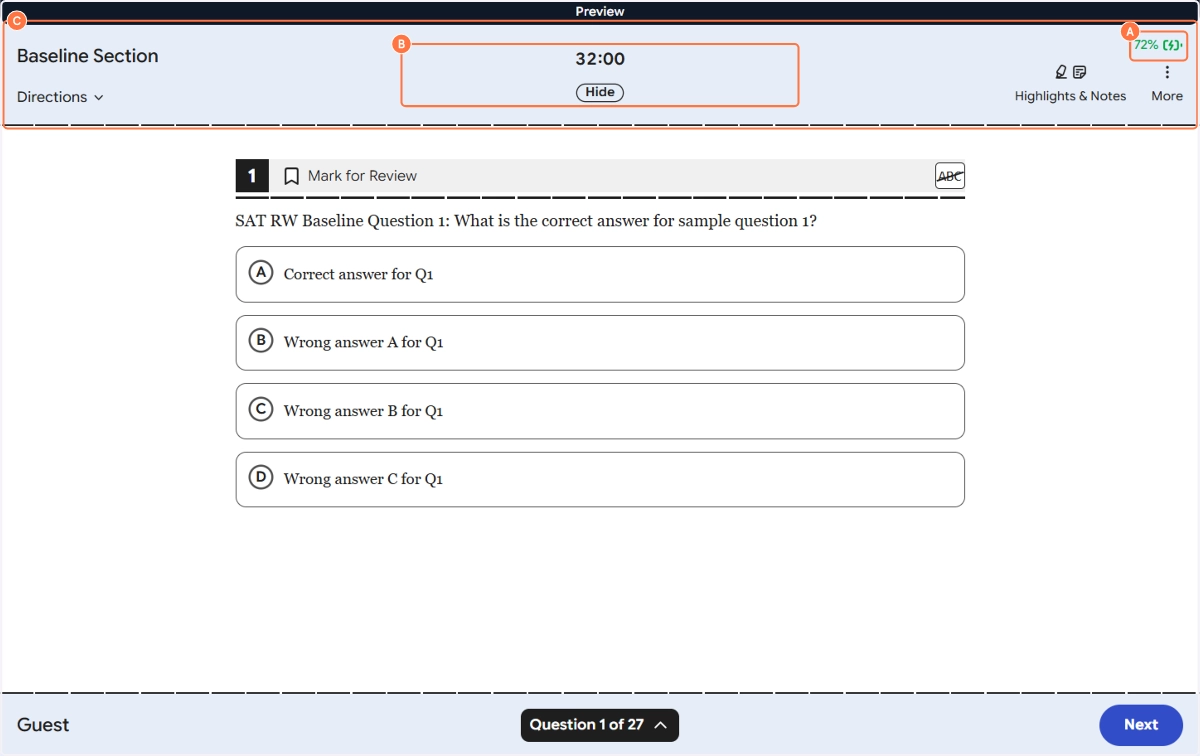
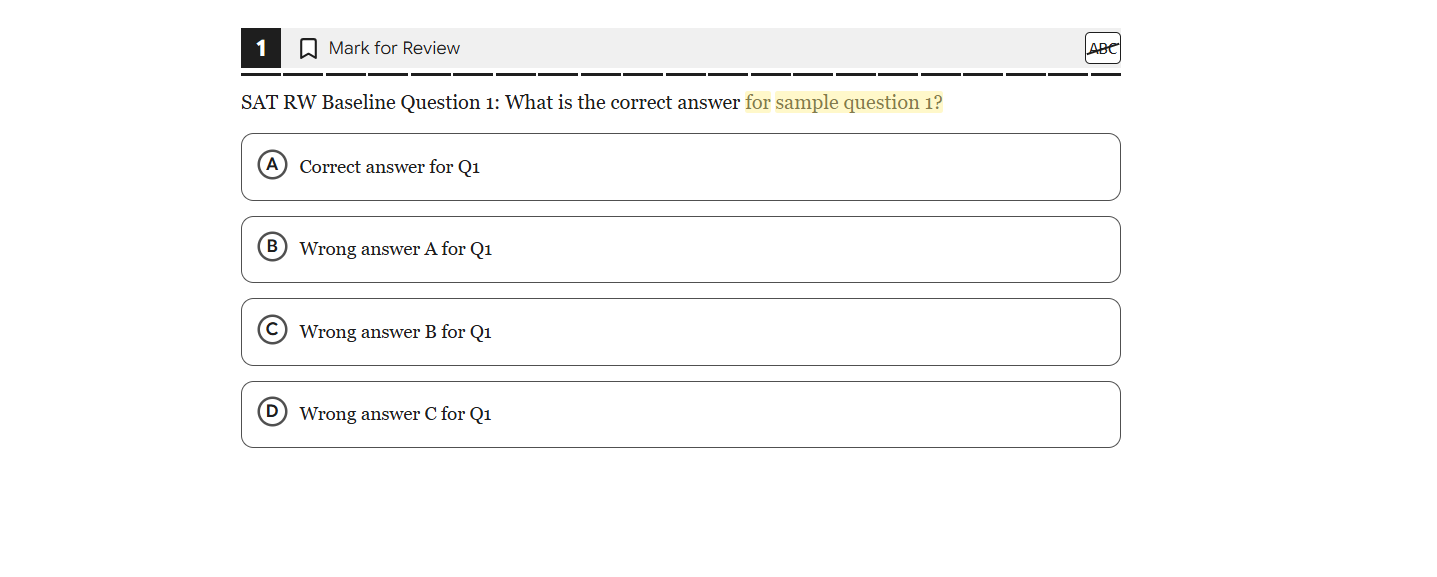
Once the directions are closed, the student is presented with the first question. The interface layout is clean and focused:
The section name (e.g., Baseline Section) is displayed in the top-left
The countdown timer (e.g., 32:00) sits at the top-center with a Hide option where students can hide the timer if it causes anxiety, just as on the real digital SAT
Device battery percentage is shown in the top-right corner as a practical indicator for students taking the test on laptops
The question number and total question count (e.g., Question 1 of 27) are shown in the bottom-center navigation bar
Step 5 - Question Navigation & Tools
The test interface comes equipped with a set of student tools that replicate the real digital SAT experience. These tools are available on every question throughout the test.
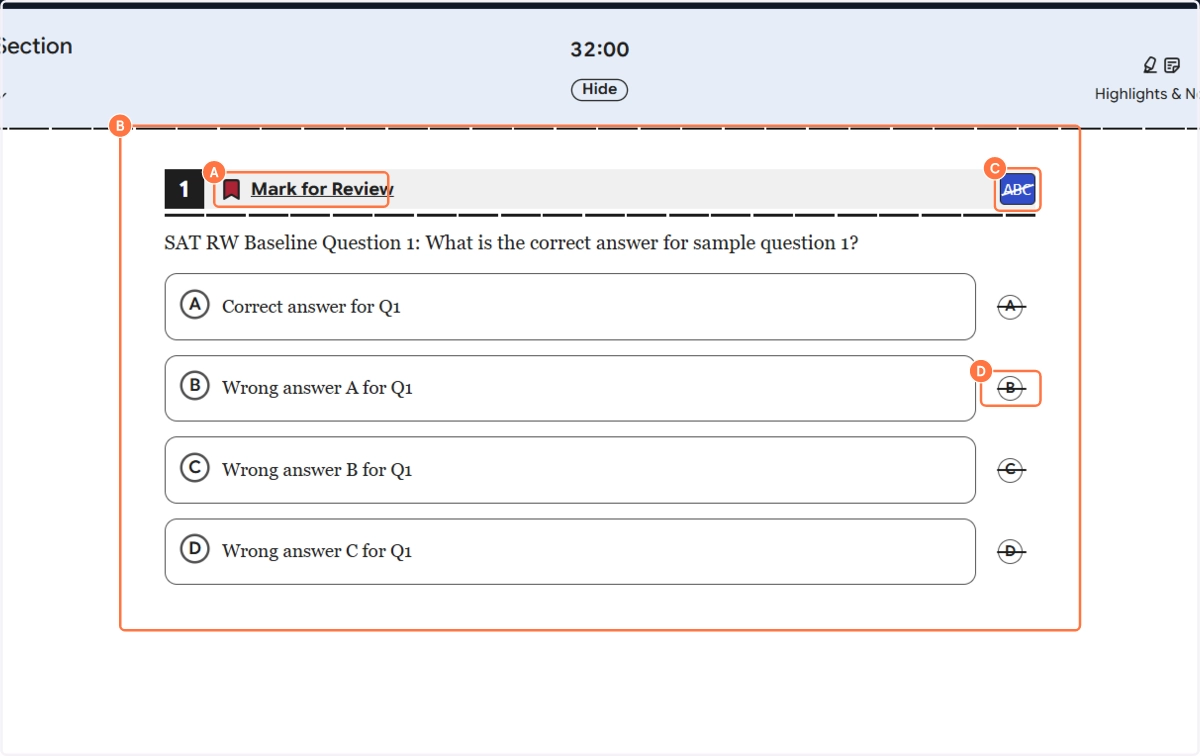
Mark for Review - Each question has a Mark for Review bookmark at the top. Students can click it to flag a question they want to come back to. Once flagged, the bookmark turns red and the question is tracked in the question navigator panel. This is a standard feature of the Bluebook app experience.
ABC Strikethrough / Option Eliminator - In the top-right corner of each question, there is an ABC button. Clicking it activates the Option Eliminator mode where students can then click on any answer option to strike it through with a cross, eliminating it from consideration. This is identical to the cross-out functionality on the real digital SAT. Students can click Undo next to any struck-through option to restore it.
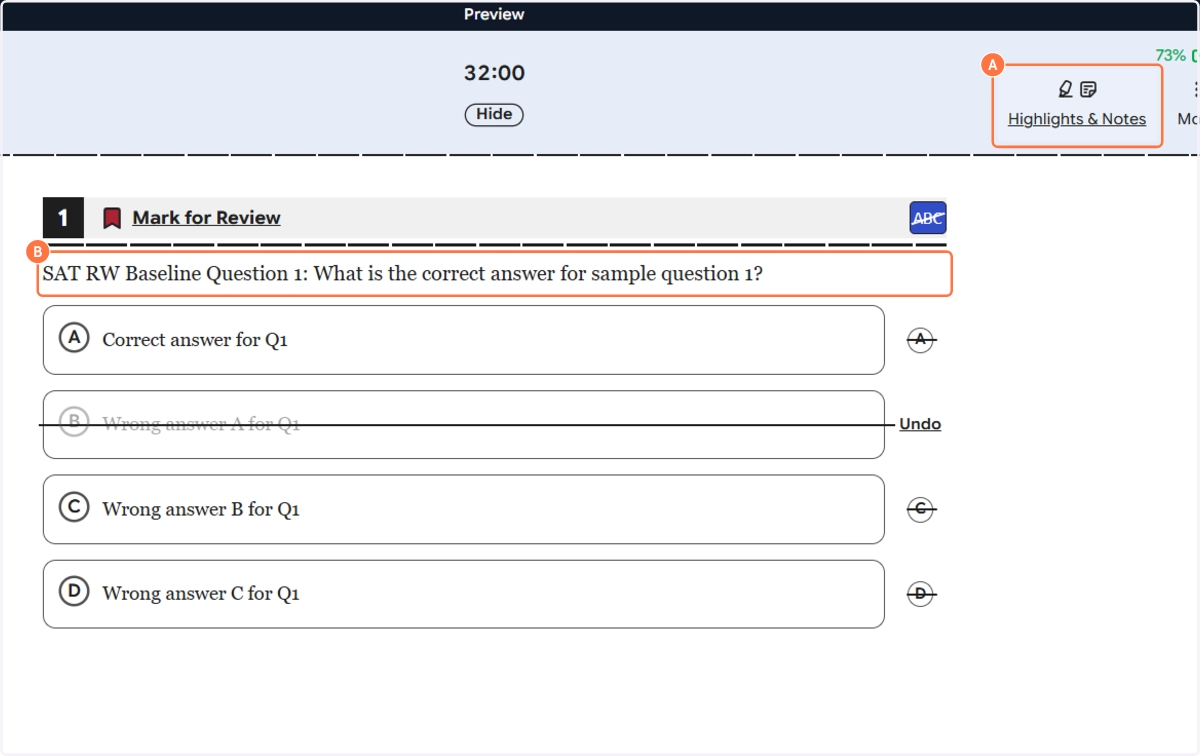
Highlights & Notes In the top-right of the header, the Highlights & Notes button (represented by a bell/note icon) gives students the ability to highlight any text on the screen in yellow and add personal notes to their highlights. This mirrors the highlighting feature available in Bluebook and helps students annotate passages and question stems during the test.
Question Navigator At the bottom of the screen, the Question X of 27 pill is tappable. Clicking it opens the Question Navigator panel, which shows all questions in the current section as numbered tiles.
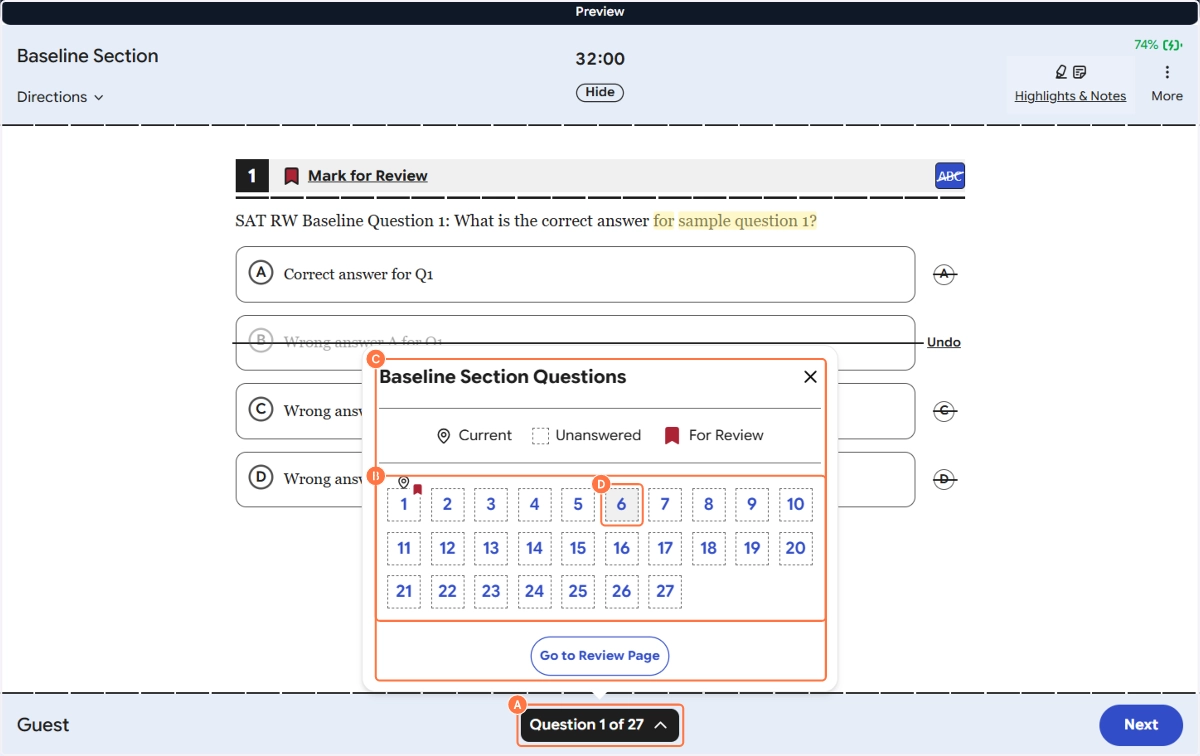
The navigator uses visual indicators:
Current - Shows which question you're currently on (marked with a location pin icon)
Unanswered - Dashed border tiles indicate questions that haven't been answered yet
For Review - A red bookmark icon on a tile means that question has been flagged for review
Students can click any tile to jump directly to that question. There's also a Go to Review Page button at the bottom of the navigator panel which takes them to the full Check Your Work screen.
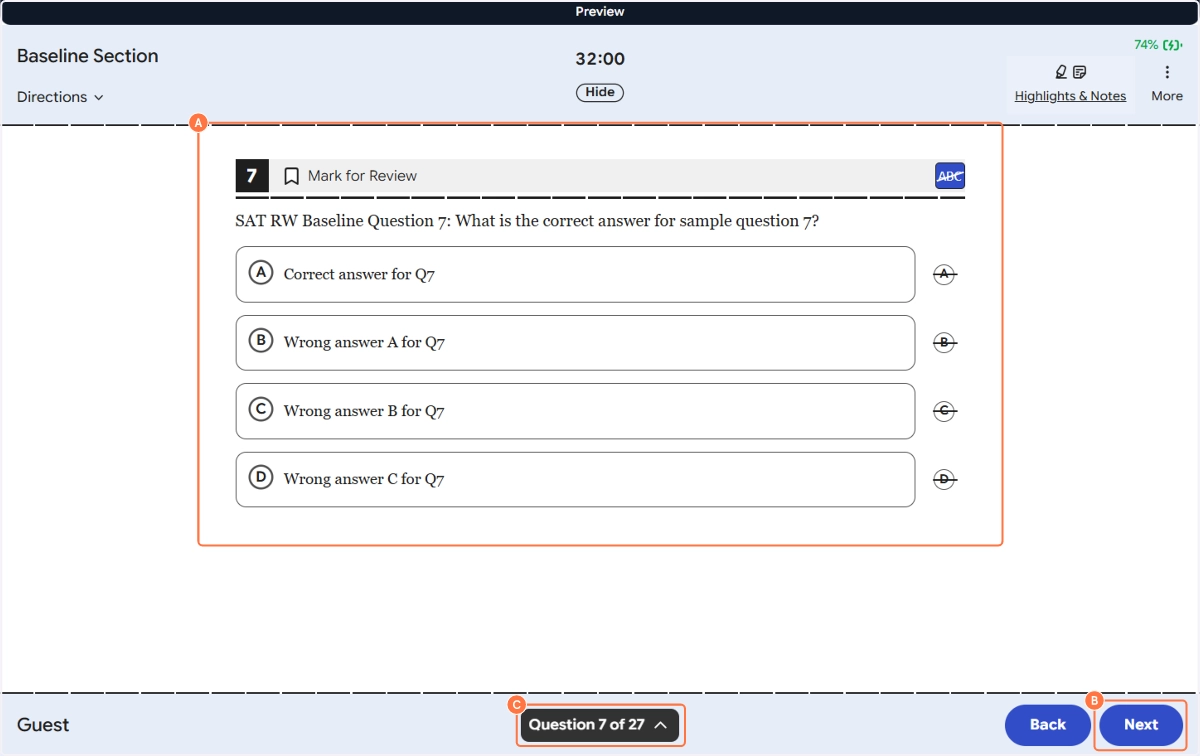
Students can also navigate linearly using the Next and Back buttons at the bottom of the screen. The Back button appears once the student has moved past the first question, enabling them to return to a previous question within the same section.
More Menu - Line Reader & Save and Exit
In the top-right corner of the test header, next to Highlights & Notes, there is a More (⋮) button. Clicking it reveals two additional options:

Line Reader - Activates a horizontal reading guide that isolates one line of text at a time across the screen. This is a helpful accessibility tool for students who find it easier to focus on content line by line, reducing visual distraction when working through long passages.
Save and Exit - This allows a student to exit the test mid-session without losing their progress. All answered questions and flagged items are saved automatically. When the student returns to the test later, they can resume exactly where they left off — their answers, flags, and remaining time are all preserved. This is particularly useful for students who may need to take a break or get disconnected mid-test.
Whether a student can save and resume depends on the attempt settings configured during allotment. If a time limit is enforced at the session level, the timer continues running even after the student exits. Make sure your allotment settings reflect how you want resumption to work before assigning the test.
Step 6 - Check Your Work & Review Page
Once a student moves through all 27 questions in a section, they reach the Check Your Work screen before the section ends and the next one begins.
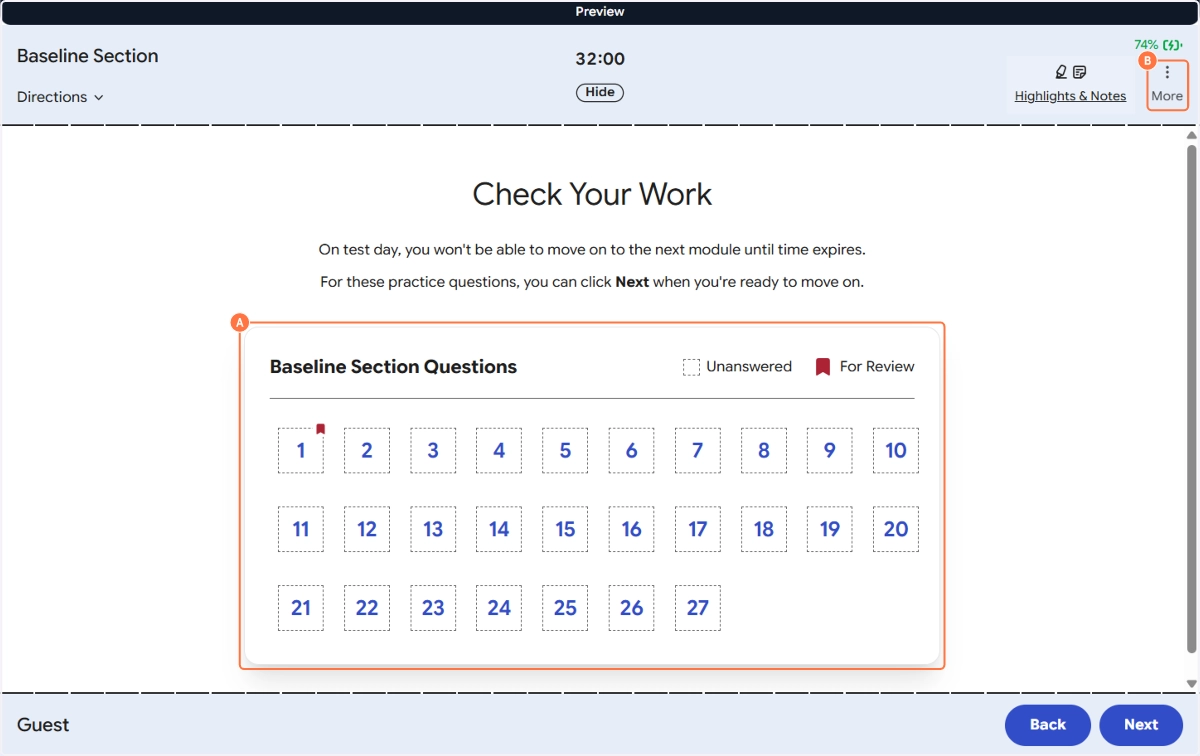
This screen displays a message: "On test day, you won't be able to move on to the next module until time expires. For these practice questions, you can click Next when you're ready to move on."
The full question grid is shown here, giving students one last opportunity to review their answers before submitting the section. The grid shows all question numbers and uses the same visual indicators as the in-question navigator:
Unanswered questions appear with a dashed border
Flagged for Review questions show a red bookmark icon on their tile
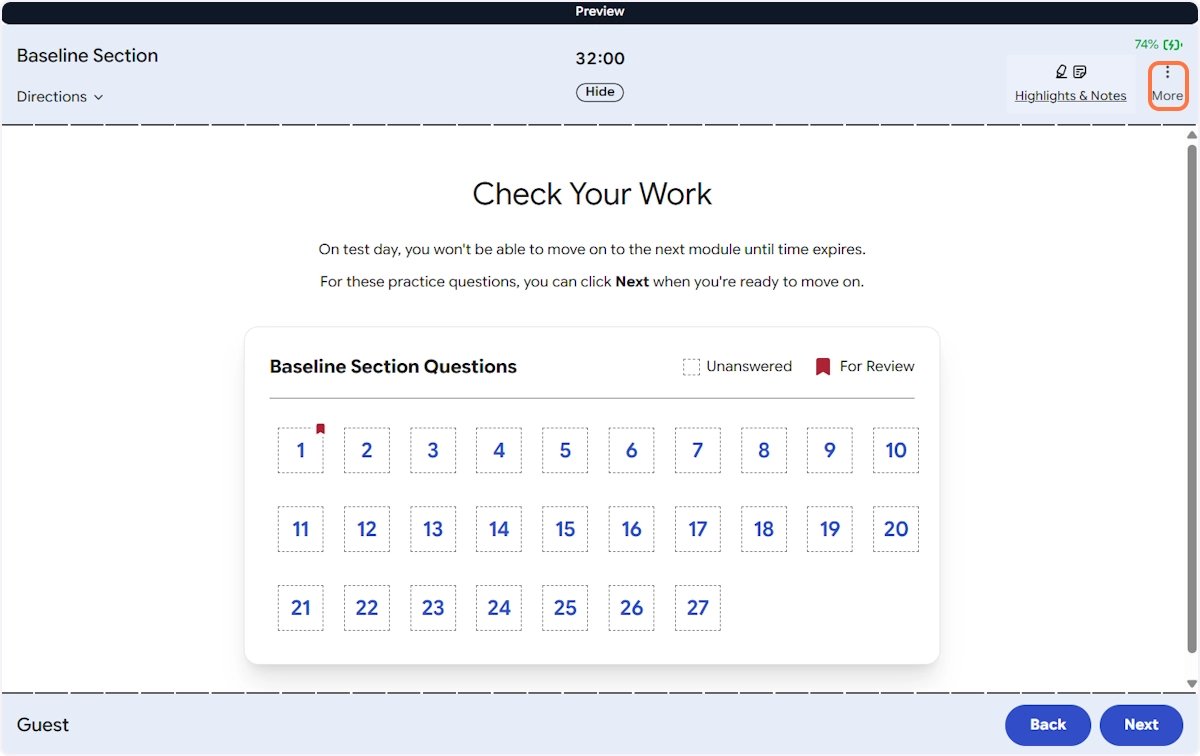
Students can click any tile to jump back to a specific question and change their answer. The More button in the top-right corner of the header provides additional options during the test session.
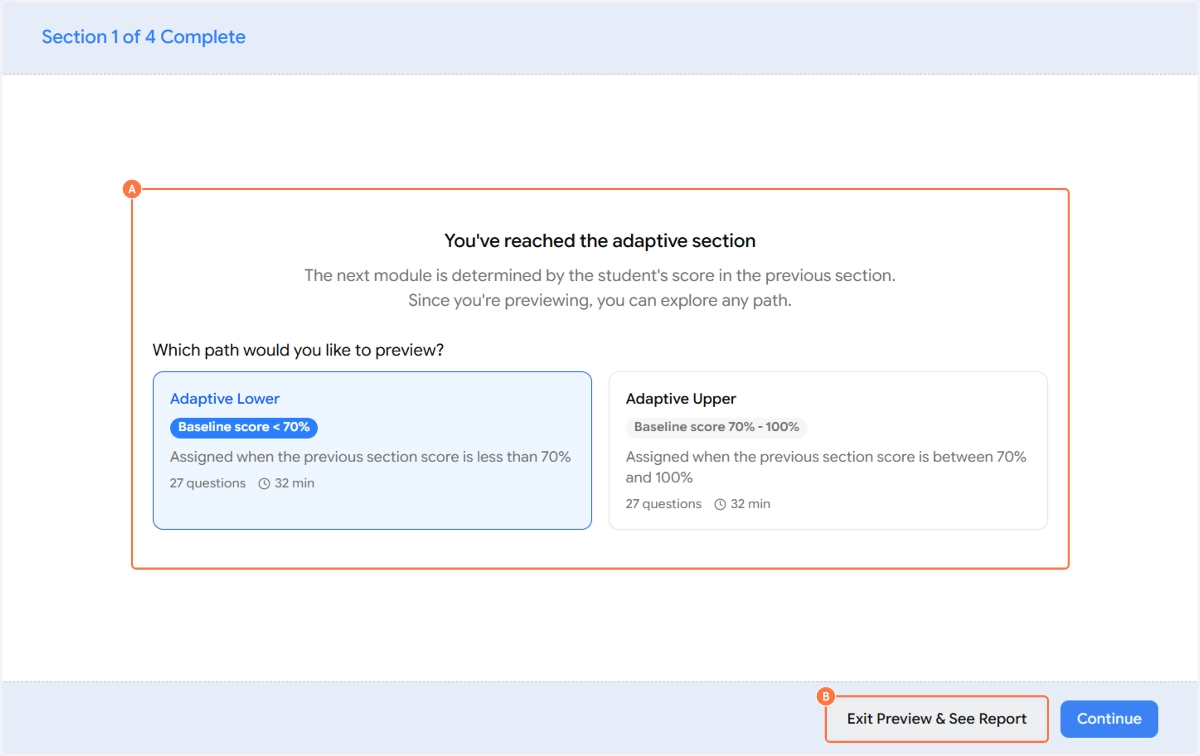
When ready, the student clicks Next to move on to the next section. For adaptive tests, this is the transition point where the system determines the appropriate adaptive path (Upper or Lower) based on the student's Baseline performance.
Here we are clicking on "Exit Preview & See Report."
This review-and-proceed flow repeats for each section of the test.
Step 7 - The Sample Report
After completing the preview (or at the end of a real test submission), EdisonOS generates a results report. In preview mode, this is a sample report populated with illustrative data not real scores so you can see the format and structure of what students will receive.

The report banner clearly states: "This is a sample report. The scores and data shown here are illustrative only. Actual student reports will reflect real performance and will be generated once a test is submitted."
The report includes:
Score Summary A large circular score indicator shows the student's total score (e.g., 64 out of 98), giving an immediate visual sense of overall performance.
Question Summary A breakdown of how the student performed across all questions:
Correct - 64 (65%)
Incorrect - 19 (19%)
Skipped - 10 (10%)
Missed - 5 (5%)
Total Questions - 98
Accuracy Percentage Displayed prominently at 77%, with a breakdown of Correct / Attempted (e.g., 64/15) and a Percentile Ranking (e.g., 72nd Percentile) showing how the student compares to others.
Score Gap Shows the gap between the student's current score and their target score for example, 14 pts with a Target Score of 78. This is a motivating data point that helps tutors set improvement goals.
Total Time Spent The total time the student spent on the test (e.g., 172m 22s), giving tutors insight into pacing.
The report format and which metrics are shown can be configured. Detailed report configuration is covered in a separate article.
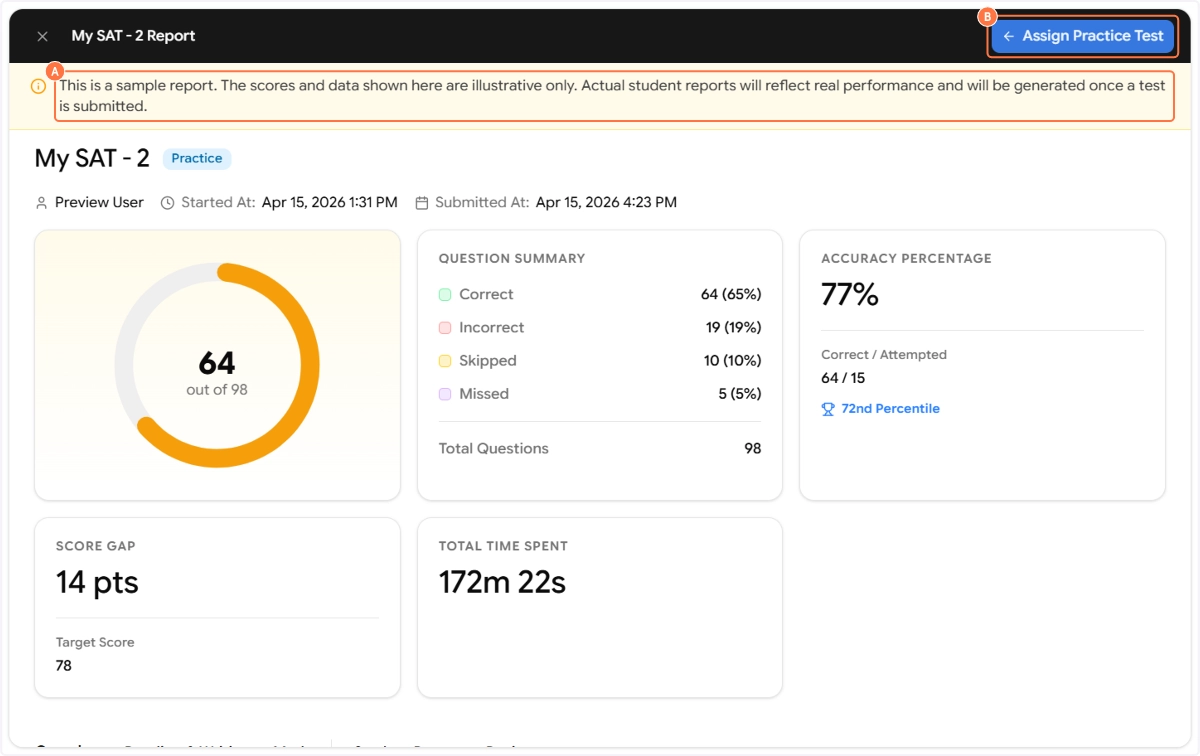
Once you've reviewed the sample report and are satisfied that the test looks and behaves as expected, click Assign Practice Test in the top-right corner of the report screen. This takes you directly to the allotment flow where you can assign the test to students, set deadlines, configure attempt limits, and more. all of which is covered in the next article.