5.3 Overall Test Settings
Overview
Beyond building the sections of a practice test, EdisonOS gives you a dedicated Practice Test Configuration panel where you can control the overall behaviour of the test from its title and description, to proctoring rules, notification preferences, and how student scores are calculated and displayed.
This article walks you through every setting available in the Practice Test Configuration panel across its three tabs: Details, Settings, and Scoring.
Step 1 - Open the Practice Test Configuration Panel
Navigate to your program (e.g., SAT) in the left sidebar and click on Practice Tests. From your list of tests in My Library, click the pencil icon on the test card you want to configure.
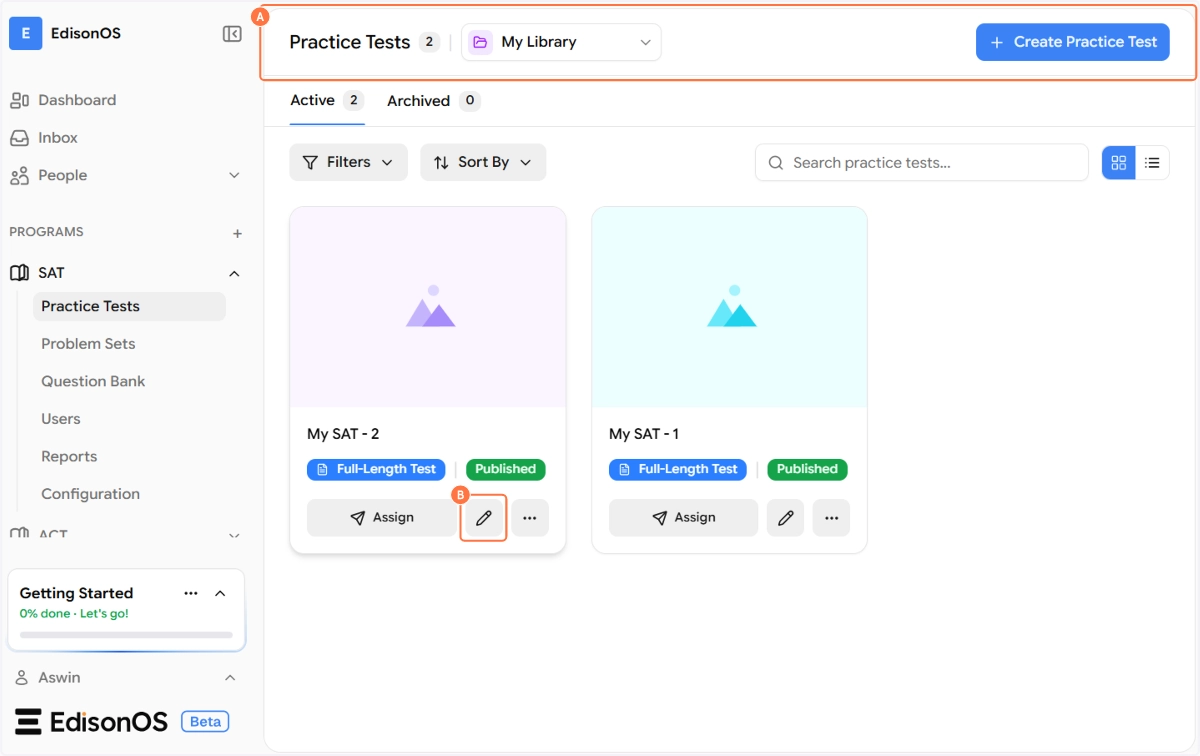
Once inside the test editor, you'll see the test's name and status (Published or Draft) in the top bar of the middle panel. Next to the test status, click the settings/filter icon (the sliders icon) to open the Practice Test Configuration panel on the right.
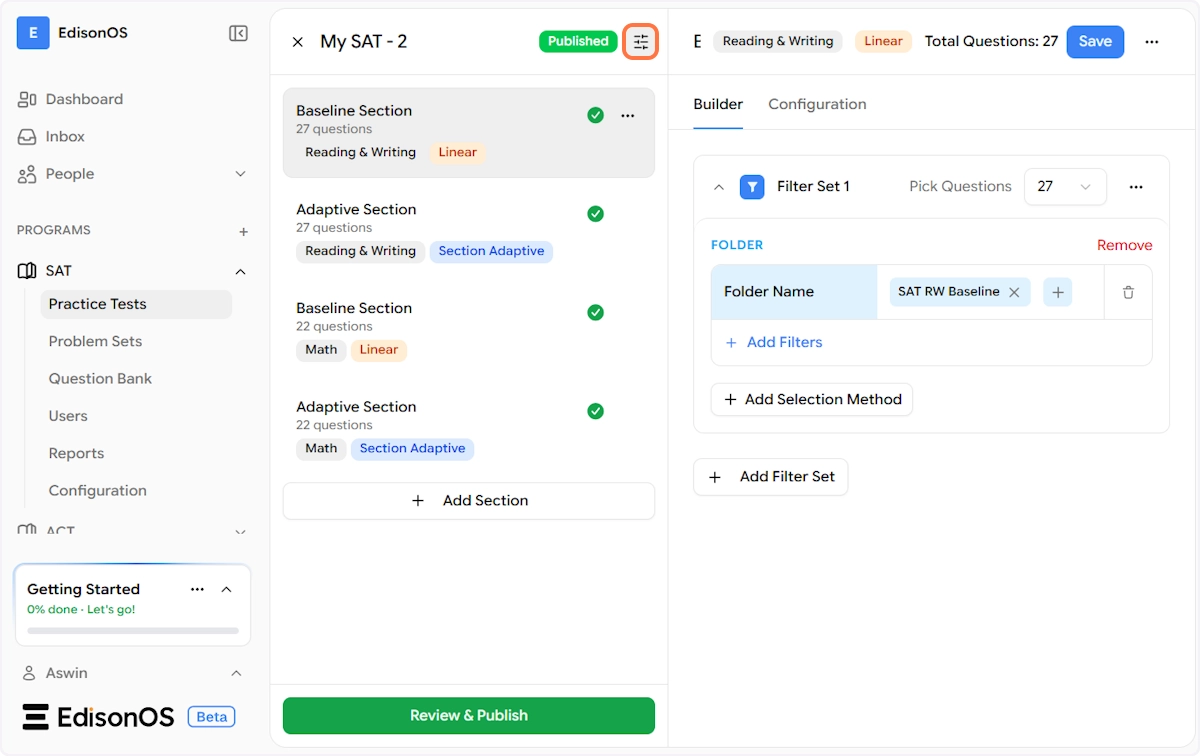
The configuration panel slides open as a right-side drawer with three tabs at the top: Details, Settings, and Scoring.
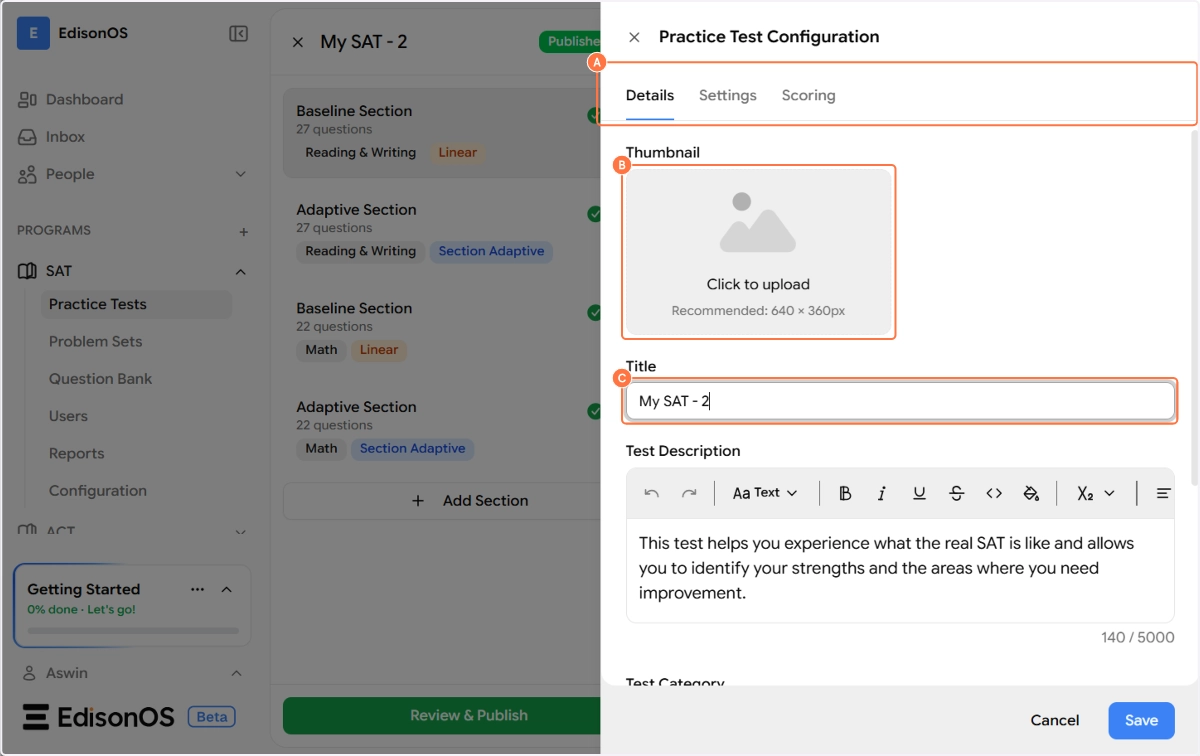
Step 2 - Details Tab
The Details tab is where you manage the core identity of your practice test, what it's called, what it says about itself, and how it's categorised.
Thumbnail
At the top of the Details tab, you'll find a Thumbnail upload area. Click it to upload a cover image for the test (recommended size: 640 × 360px). The thumbnail appears on the test card in the Practice Tests library and gives students a visual cue about the test before they start.
Title
This is the name of your practice test as it appears to both tutors and students. You can rename the test at any time here. For example: My SAT - 2.
Test Description
Use the rich text editor to write or update the test's description. This is what students will read on the test overview screen before starting. The editor supports bold, italic, underline, strikethrough, code, subscript, superscript, and alignment formatting.
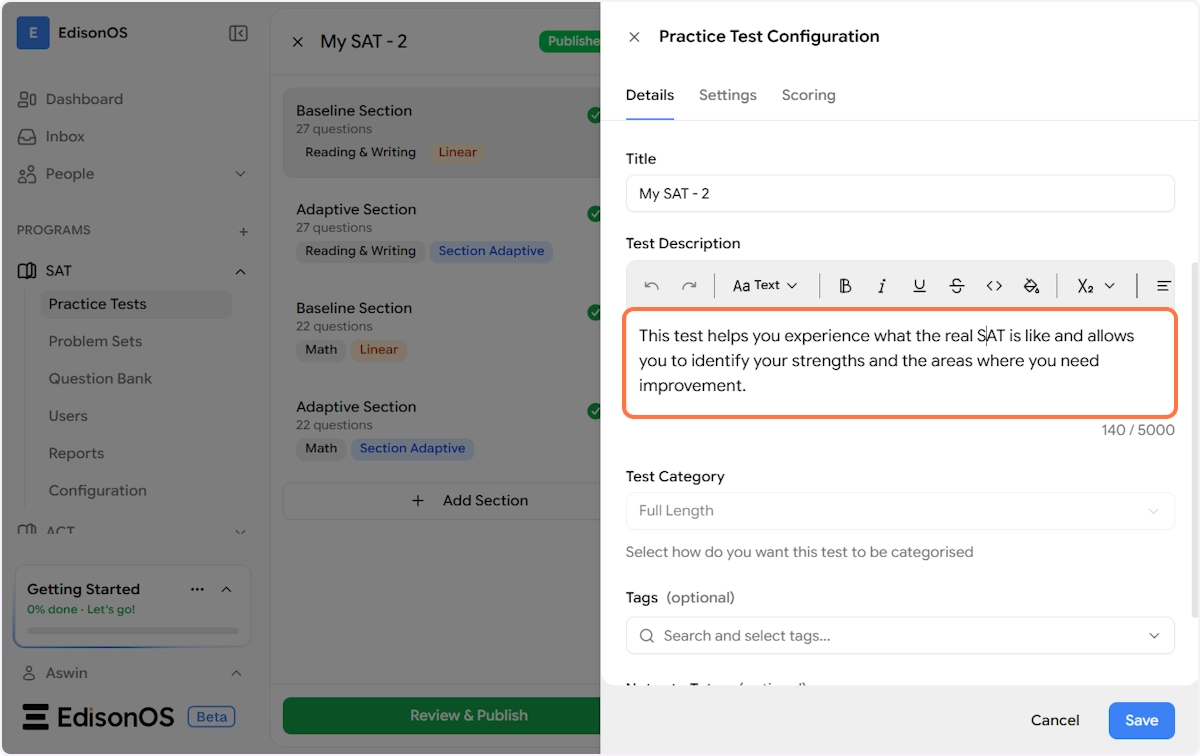
Test Category
This dropdown lets you categorise the test. Based on the template chosen during creation, this is pre-set (e.g., Full Length). You can adjust it here if the category needs to change.
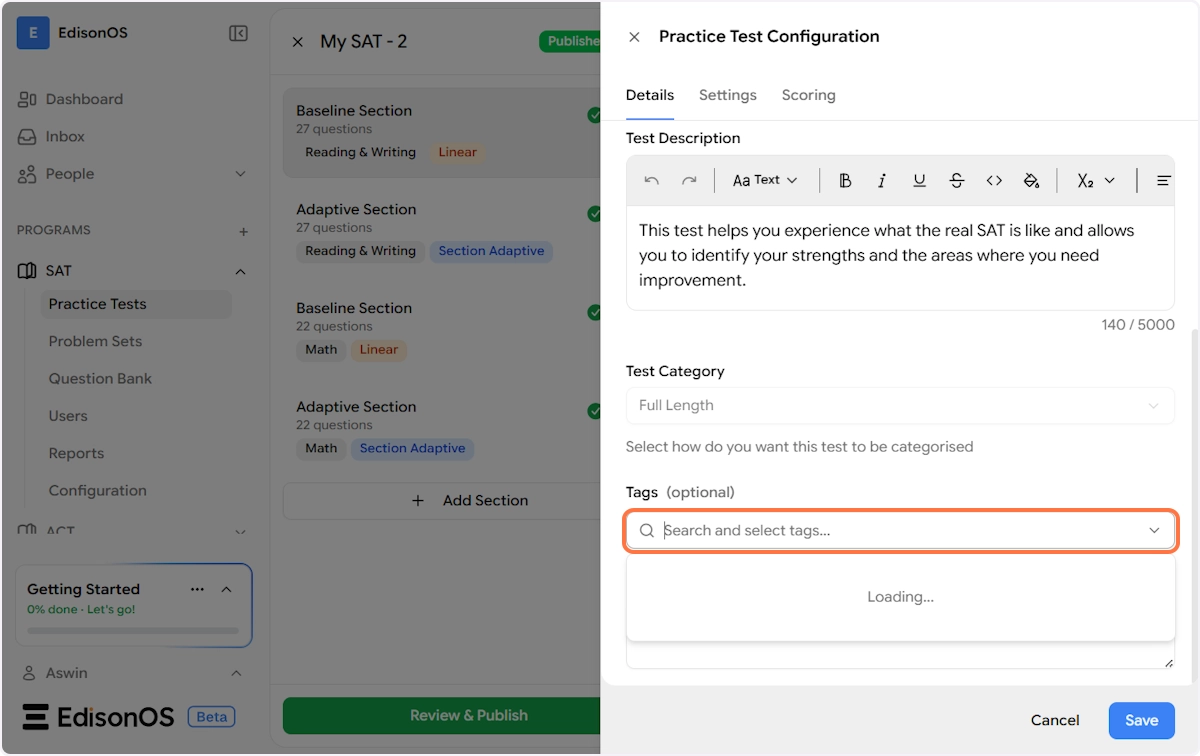
Tags (optional)
Click the Search and select tags field to search for and attach tags to the test. Tags help you filter and find tests faster in your library, especially when you have a large number of tests across different programs.
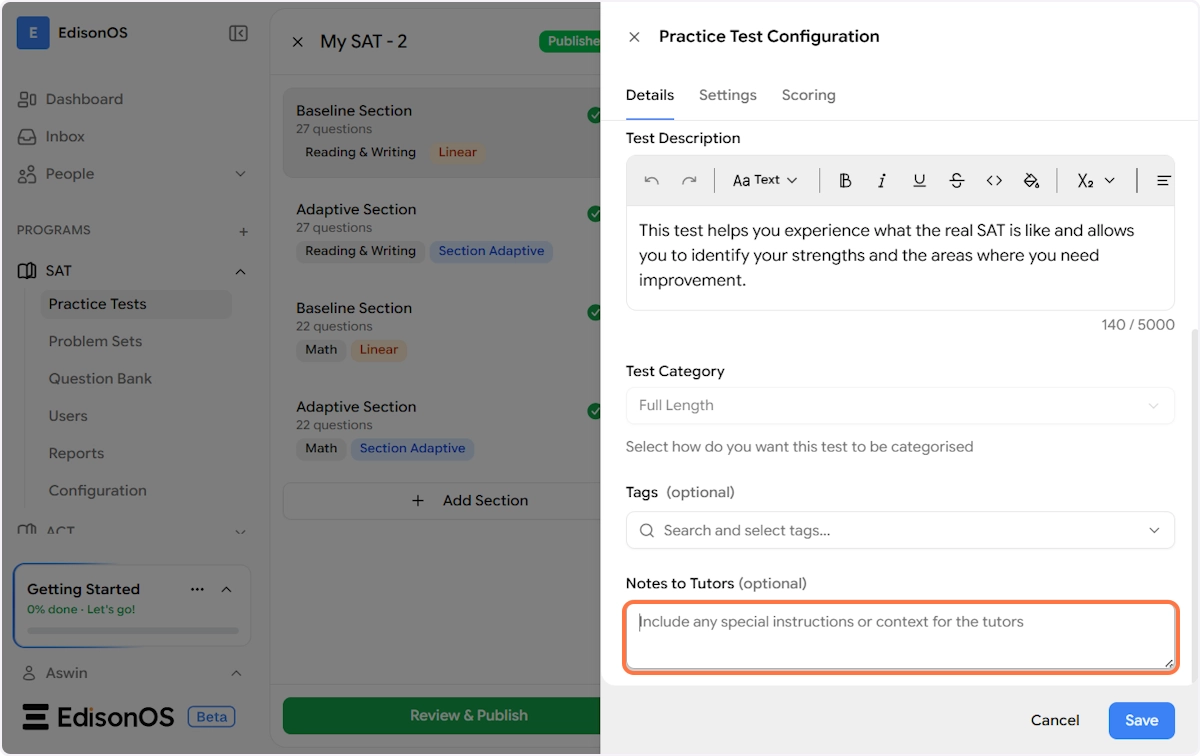
Notes to Tutors (optional)
This is a private text field visible only to your internal team like tutors and admins and never shown to students. Use it to include context such as when to assign this test, which student profile it's suited for, or any special instructions for tutors delivering the session.
Example: "Use it for new students on their first week"
Step 3 - Settings Tab
The Settings tab controls how the test is administered and the rules students experience while taking it. This is divided into three groups: General Settings, Proctoring, and Notification Preferences.
General Settings
Randomize Options When enabled, the order of answer choices for every question in the test is randomized each time a student takes it. This prevents answer-pattern memorization and is especially useful when the same test is administered to multiple students.
Sequential Numbering When enabled, questions are numbered continuously across all sections of the test (e.g., questions 1–27 in Section 1, then 28–54 in Section 2, and so on). When disabled, each section resets the numbering back to question 1, so students see question numbers relative to the section they're in.
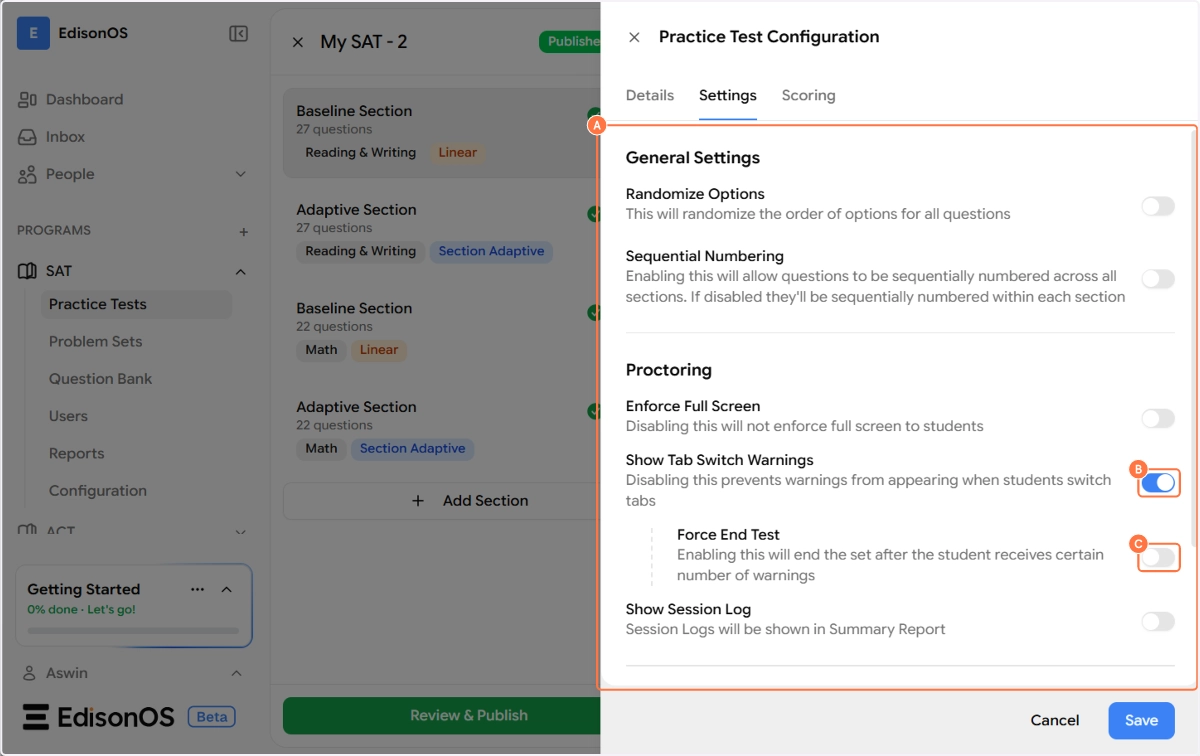
Proctoring
The Proctoring group controls the integrity measures applied during the test session.

Enforce Full Screen When enabled, students are required to stay in full-screen mode for the duration of the test. If they exit full screen, a warning is triggered. Disabling this allows students to take the test in a regular browser window without enforcement.
Show Tab Switch Warnings When enabled, students receive a warning notification if they switch to another browser tab or application during the test. This is one of the core proctoring signals for online assessments.
When Show Tab Switch Warnings is turned on, an additional sub-setting becomes available:
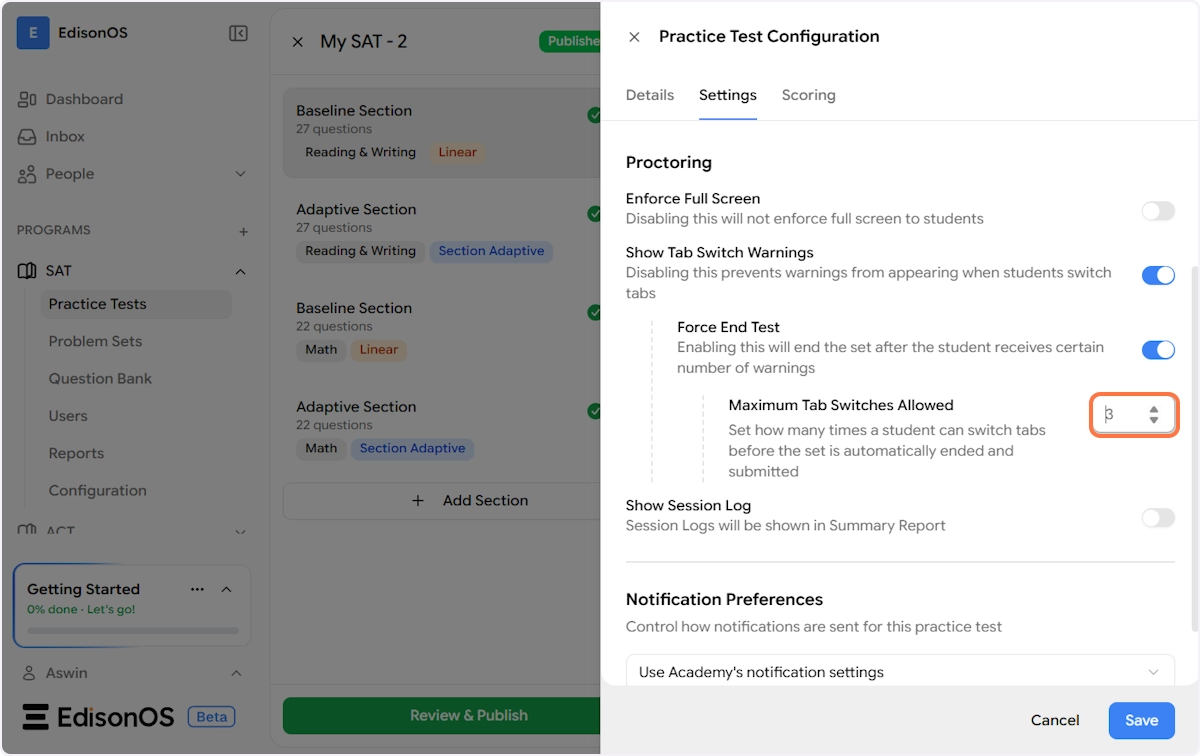
Force End Test - When this is enabled, the test will be automatically ended and submitted once the student has exceeded the allowed number of tab switch warnings. This is a stronger enforcement measure for high-stakes tests.
Maximum Tab Switches Allowed - This field appears when Force End Test is enabled. Set the number of tab switches a student is permitted before the test is force-submitted. For example, setting this to 3 means that on the 4th tab switch, the test ends automatically.
Show Session Log When enabled, a session log is recorded for each student's test attempt and included in the Summary Report. The session log captures activity during the test, providing tutors with a more complete picture of how a student engaged with the assessment.
Notification Preferences
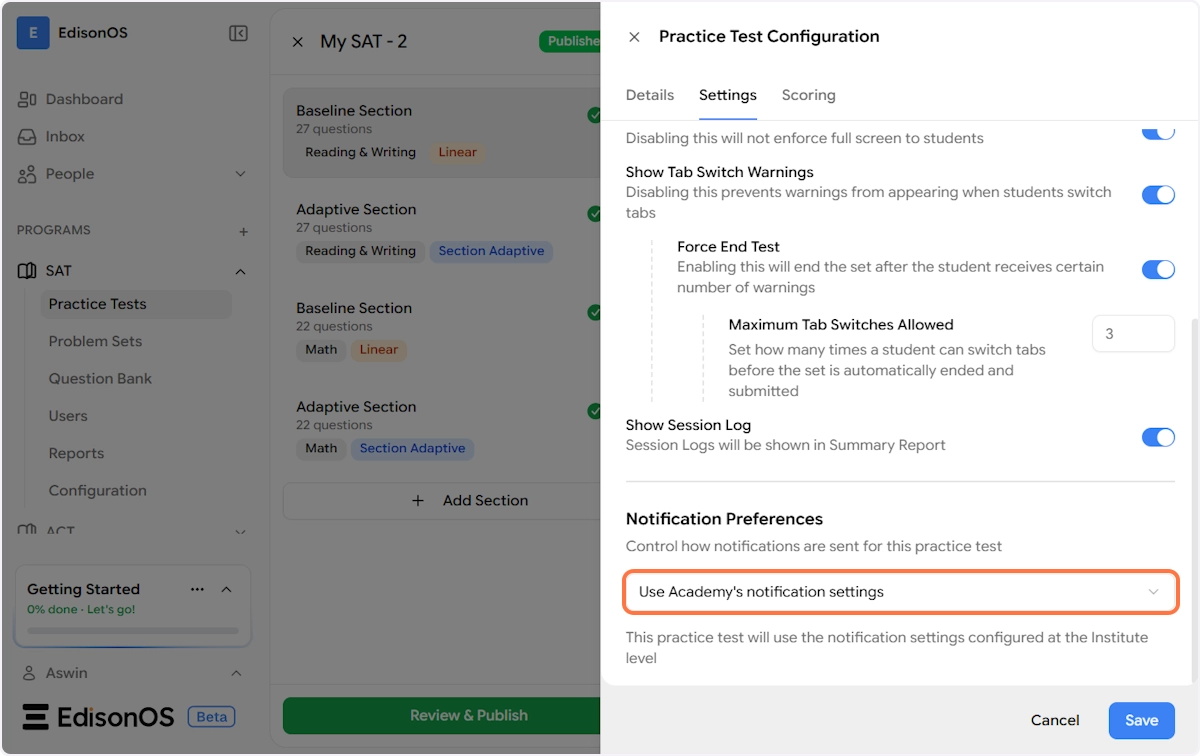
This section controls how and to whom notifications are sent when key events happen during this practice test's lifecycle.
You have two options via the dropdown:
Use Academy's Notification Settings This is the default. When selected, the practice test inherits the notification rules configured at the institution (academy) level. Any changes made to the academy-level notification settings will automatically apply to this test. This is the recommended setting if you want all your tests to behave consistently.

Customize Notifications When you select this option, you override the academy-level settings and define notification rules specifically for this practice test. A note confirms: "You're overriding the Institute's notification settings for this practice test."
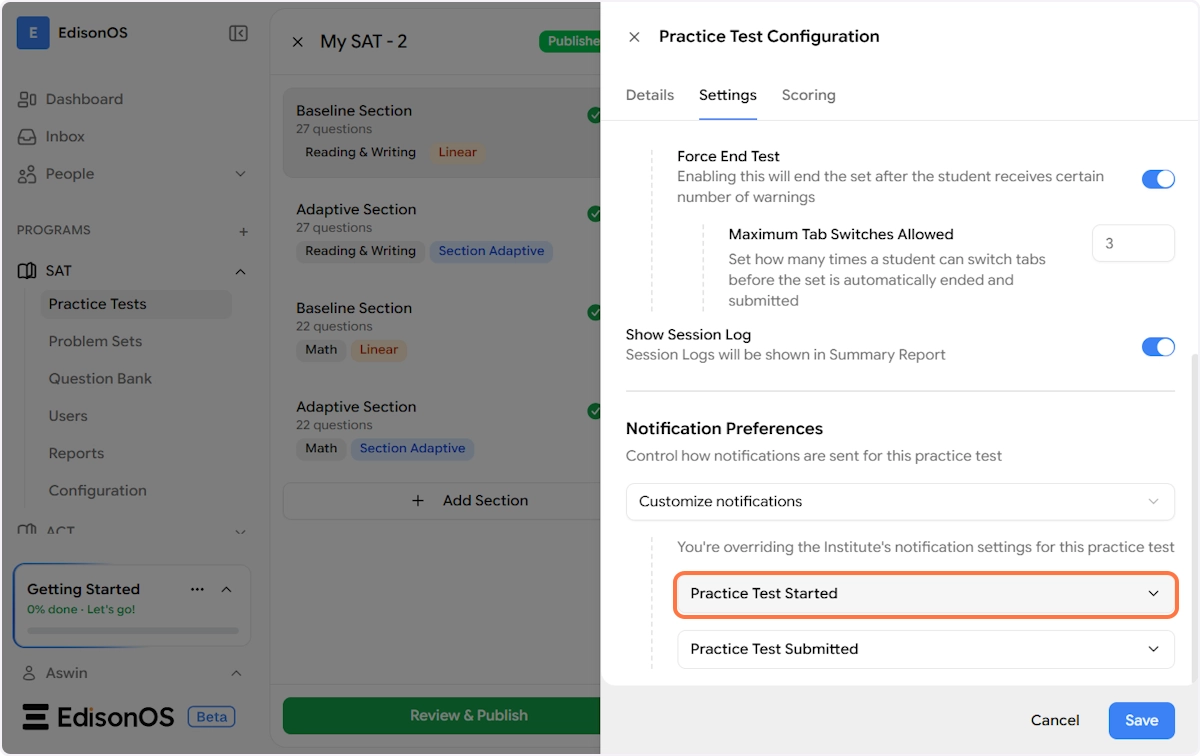
Once you choose Customize Notifications, two event-based notification groups appear, each with their own set of recipient checkboxes:
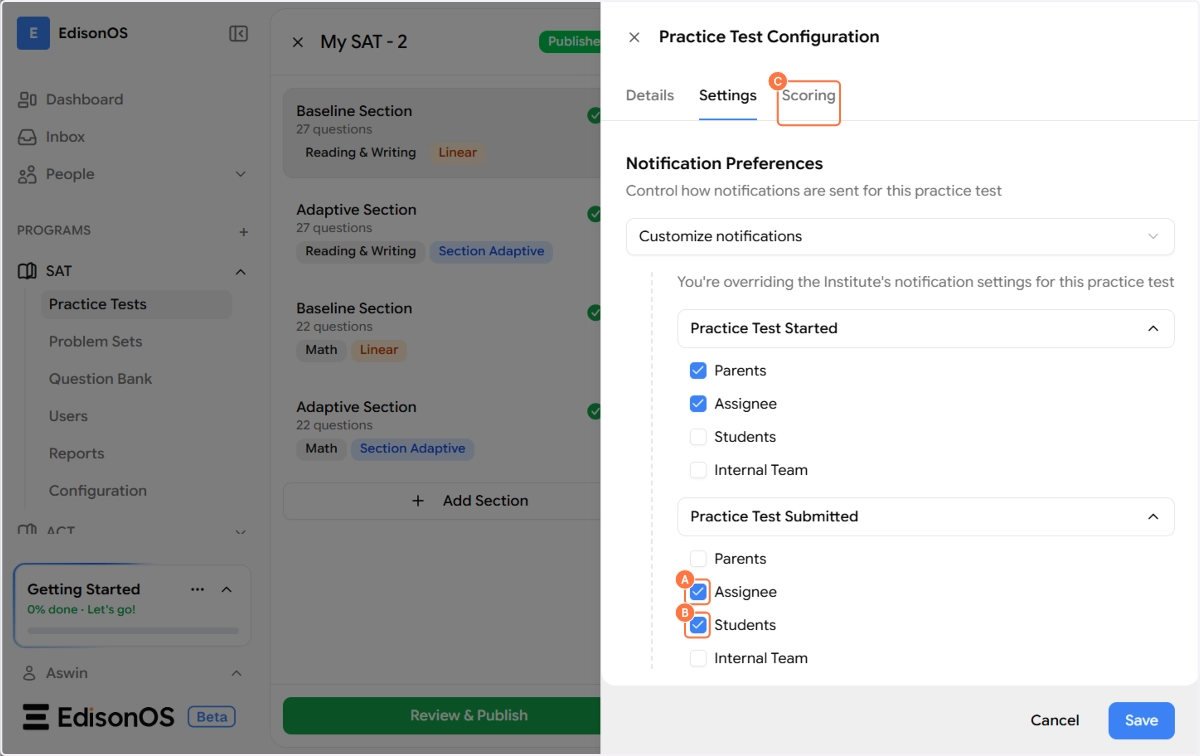
Practice Test Started Controls who gets notified when a student begins the test. You can choose any combination of:
Parents - Notifies the student's linked parent/guardian
Assignee - Notifies the tutor or staff member the test was assigned through
Students - Notifies the student themselves (useful as a confirmation trigger)
Internal Team - Notifies your internal administrative or operations team

Practice Test Submitted Controls who gets notified when a student completes and submits the test. The same four recipient groups are available. In the example shown, Assignee and Students are checked meaning when a student submits, both the tutor and the student receive a notification.
Step 4 - Scoring Tab
Click the Scoring tab to control how student performance is measured and reported across the entire test.
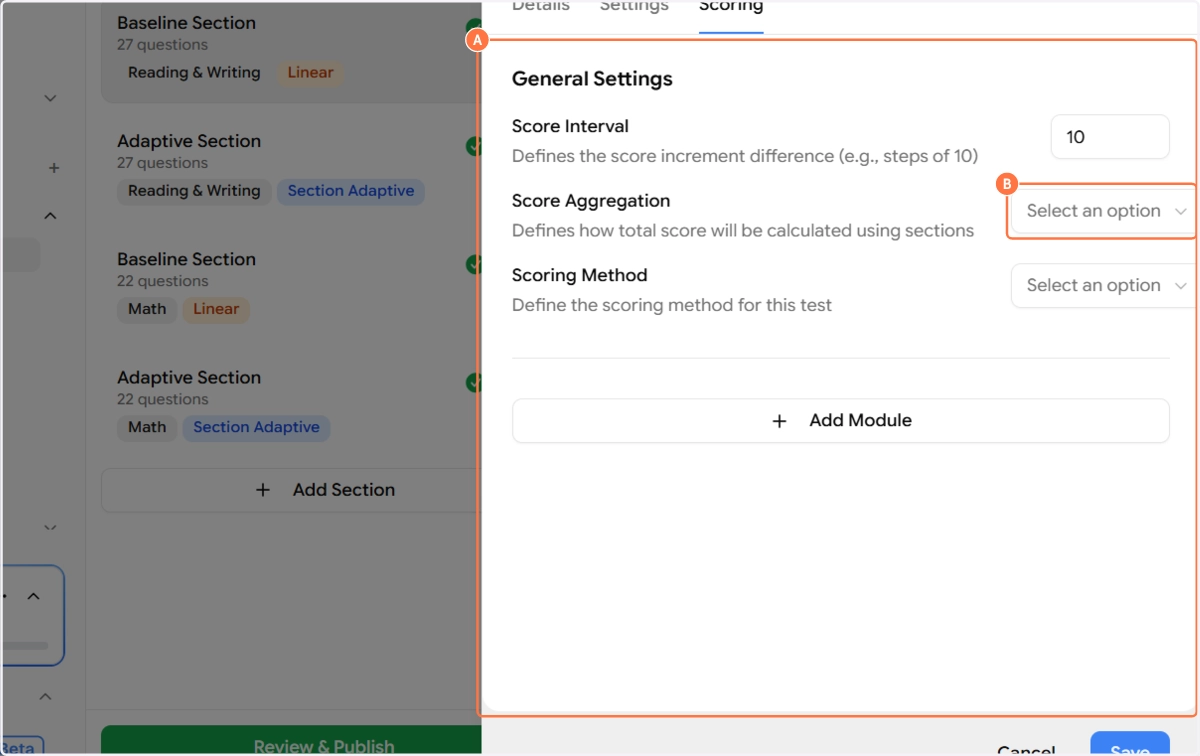
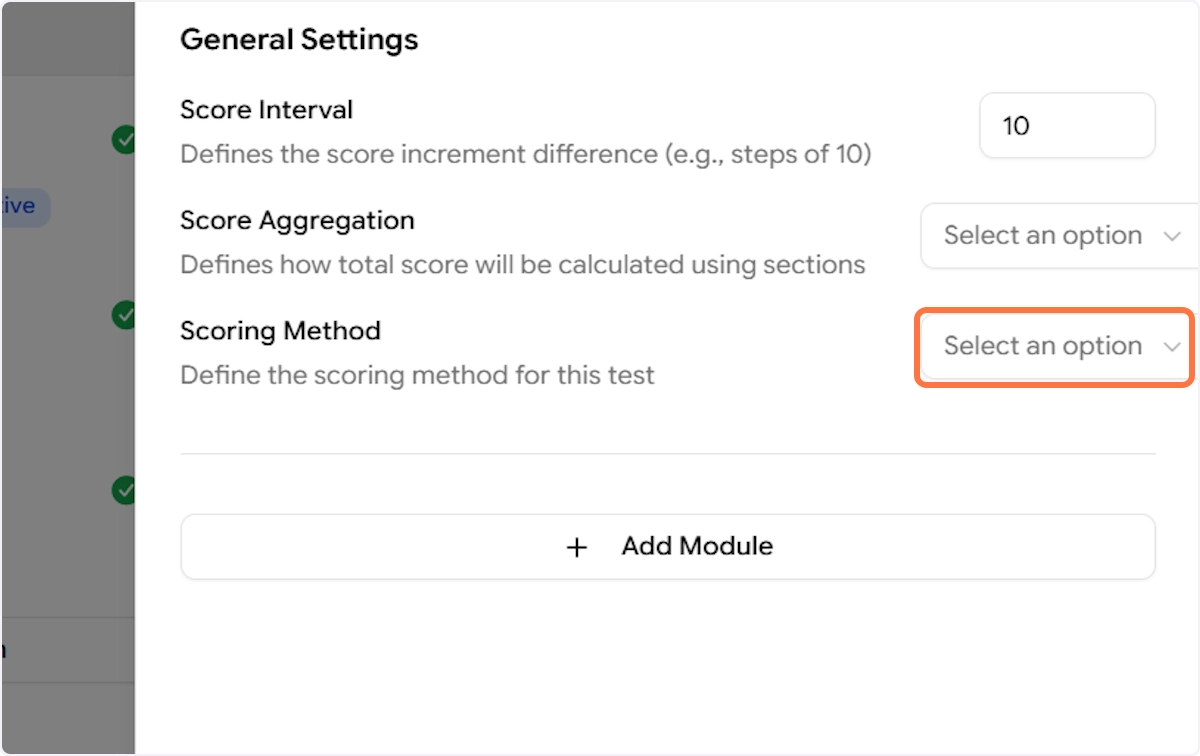
General Settings
Score Interval This defines the increment steps used when displaying scores. For example, setting this to 10 means scores will be shown in multiples of 10 (e.g., 200, 210, 220). This is particularly useful for SAT-style score reporting where scores follow a scaled range.
Score Aggregation This defines how the total score across all sections is combined into a single overall score. Click the dropdown to choose from three options:
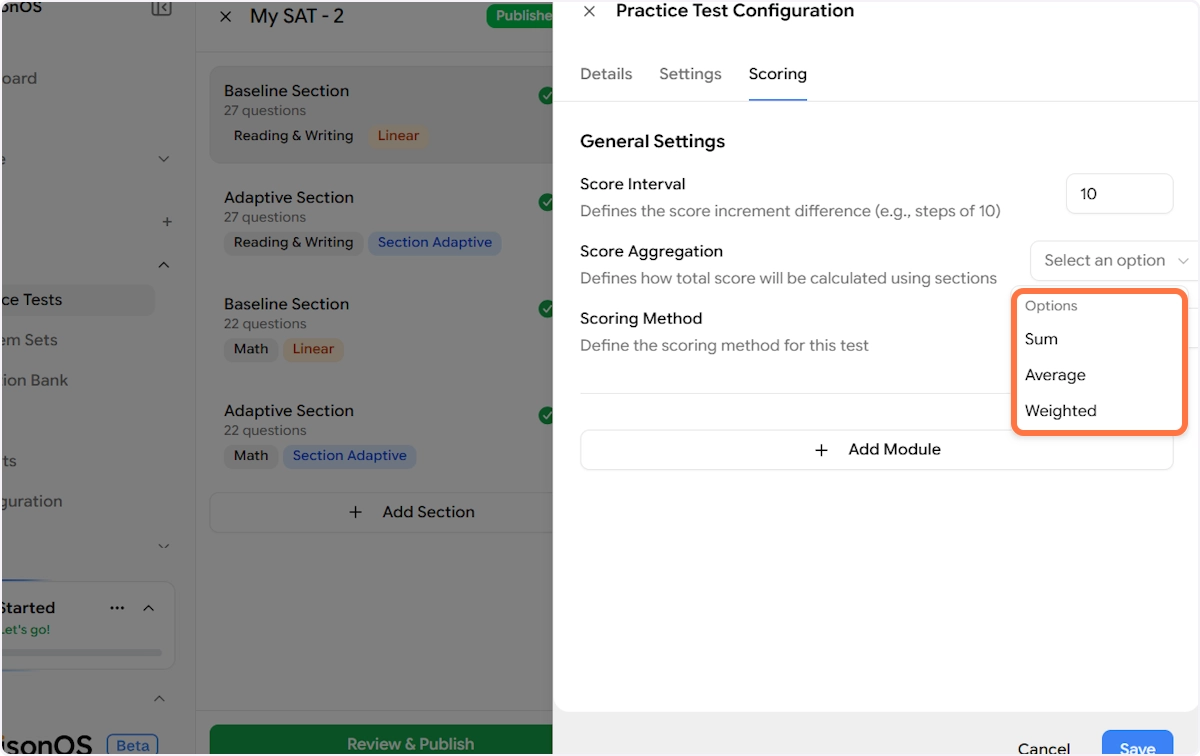
Sum - Adds up the raw scores from all sections to produce a total. Best used when all sections carry equal weight.
Average - Calculates the mean score across sections. Useful when you want a balanced view across varying section lengths.
Weighted - Allows different sections to contribute different proportions to the total score. Best used for tests where some sections are more heavily weighted than others (e.g., if Math and Reading & Writing carry different score bands).
Scoring Method This defines the underlying method used to calculate scores within the test. Click the dropdown to choose from three options:
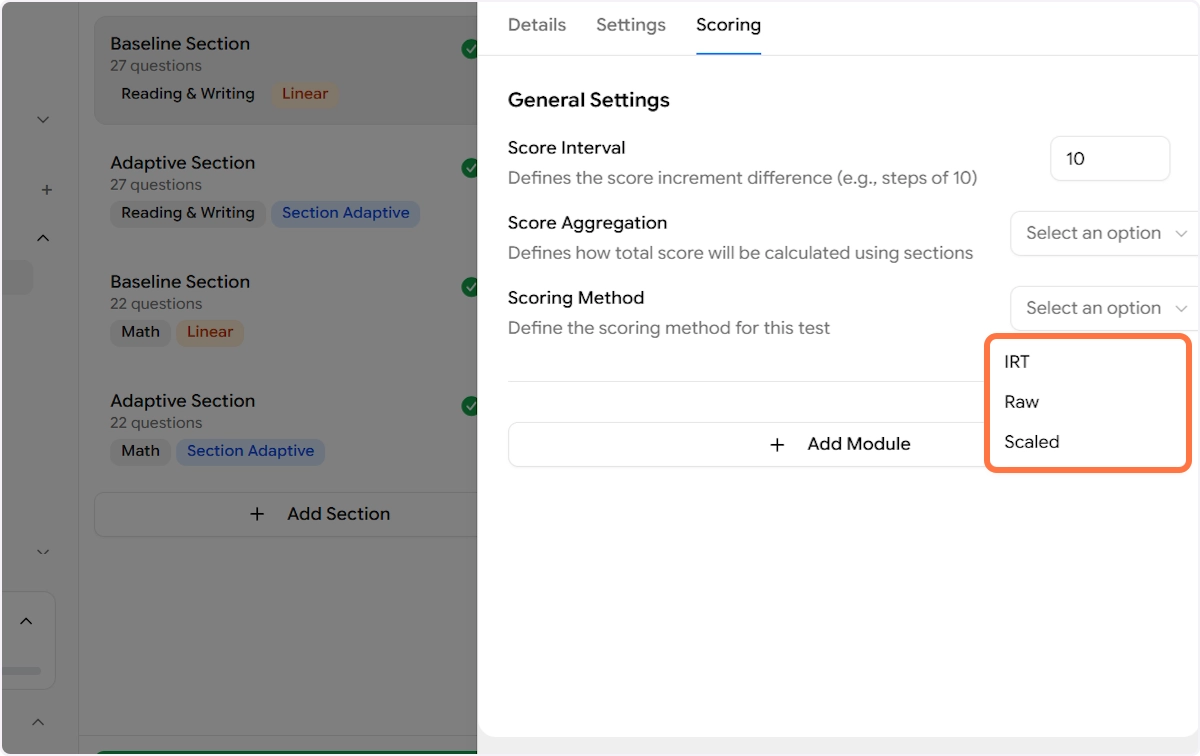
IRT (Item Response Theory) — A psychometric model that calculates scores based on the difficulty of each question answered correctly, not just the total number right. This produces more accurate ability estimates, especially for adaptive tests. Recommended for Full-Length SAT-style tests where question difficulty is calibrated.
Raw — A straightforward count of correct answers. No adjustments are made for question difficulty. Best used for simple, non-adaptive assessments.
Scaled — Raw scores are converted to a predefined scale range (e.g., 200–800 for the SAT). Use this when you want student scores to align with an official or standardized score band.
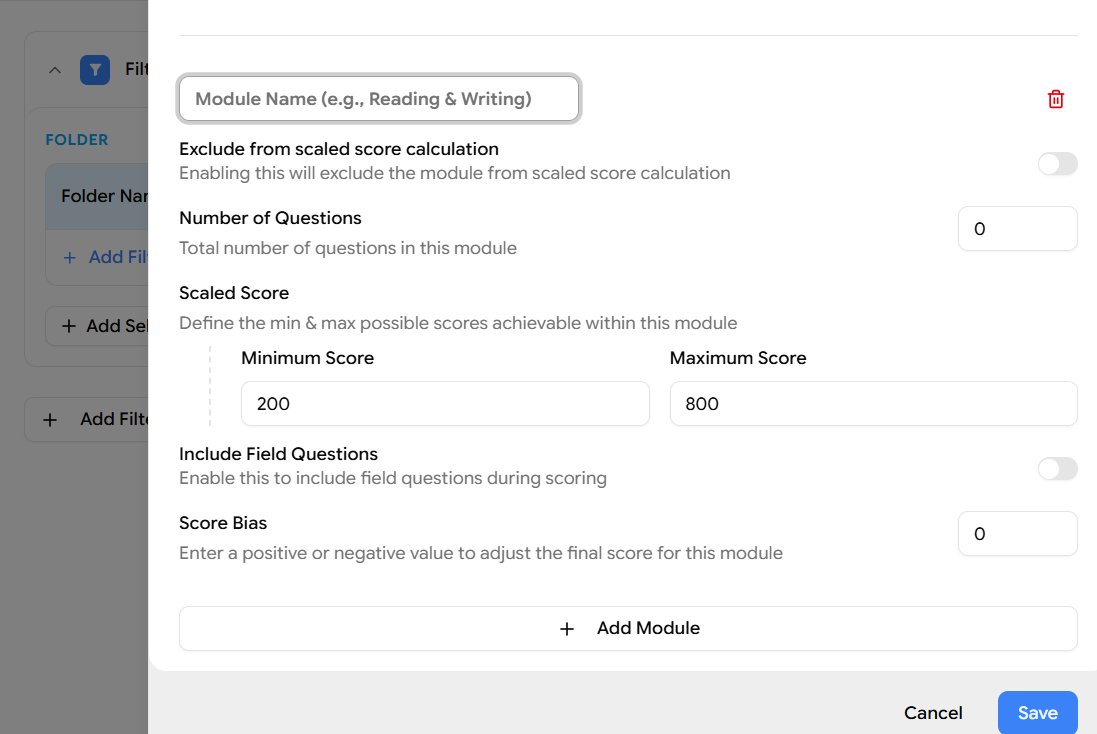
Add Module**
At the bottom of the Scoring tab, you'll find a + Add Module button. This allows you to define scoring rules at the module level (e.g., separate score configurations for Reading & Writing and Math), giving you granular control over how each subject area is scored and reported independently.
Step 5 - Save Your Configuration
Once you've made your changes across any or all of the three tabs, click the Save button at the bottom-right of the configuration panel to apply everything.
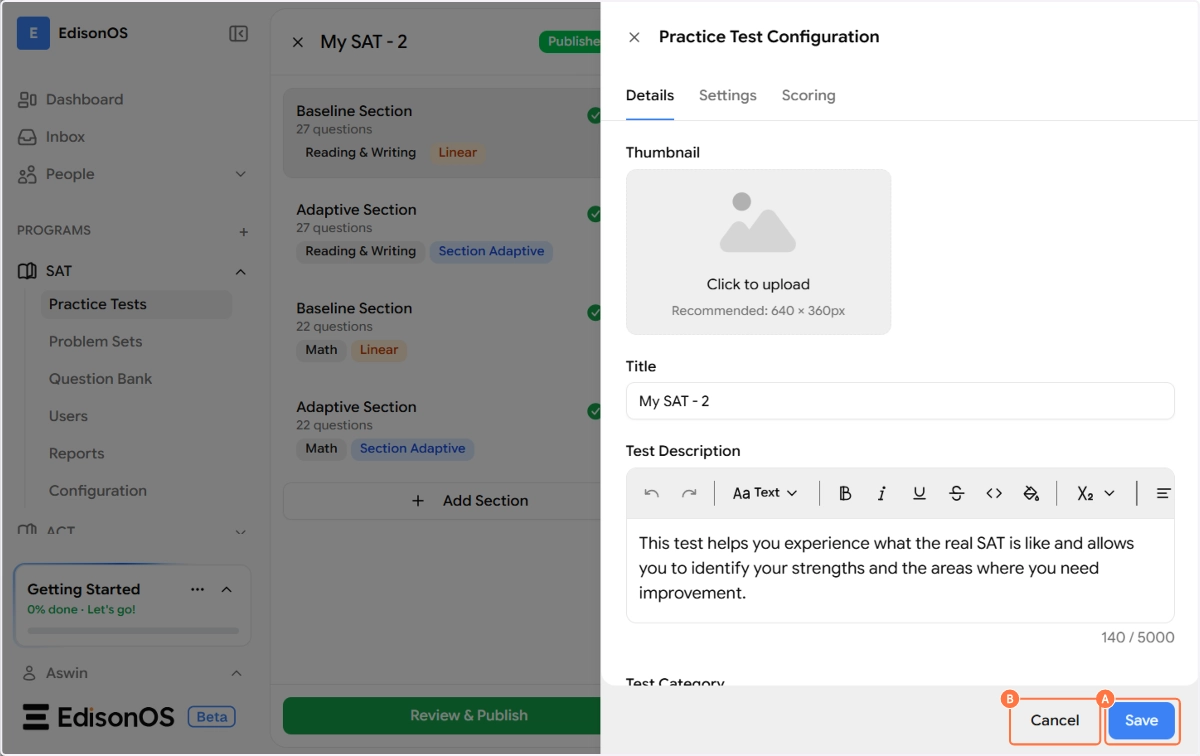
Clicking Cancel at any point will discard any unsaved changes and close the panel without modifying the test.
What's next? Now that your practice test is fully configured, you're ready to assign it to students. The next article covers how to use Allotments to control which students or groups can access this test, along with start dates, deadlines, and attempt limits.