5.2 Configuring Sections & Rules
Overview
Once a practice test has been created, you can go back into it at any time to configure each section individually like setting time limits, navigation rules, testing tools, and more. This article walks you through how to access and modify the section-level settings for any practice test saved in My Library.
This article covers section configuration only. Test-level settings such as thumbnail, general settings, proctoring settings and remaining other test settings are covered in a separate article.
Step 1 - Open a Practice Test for Editing
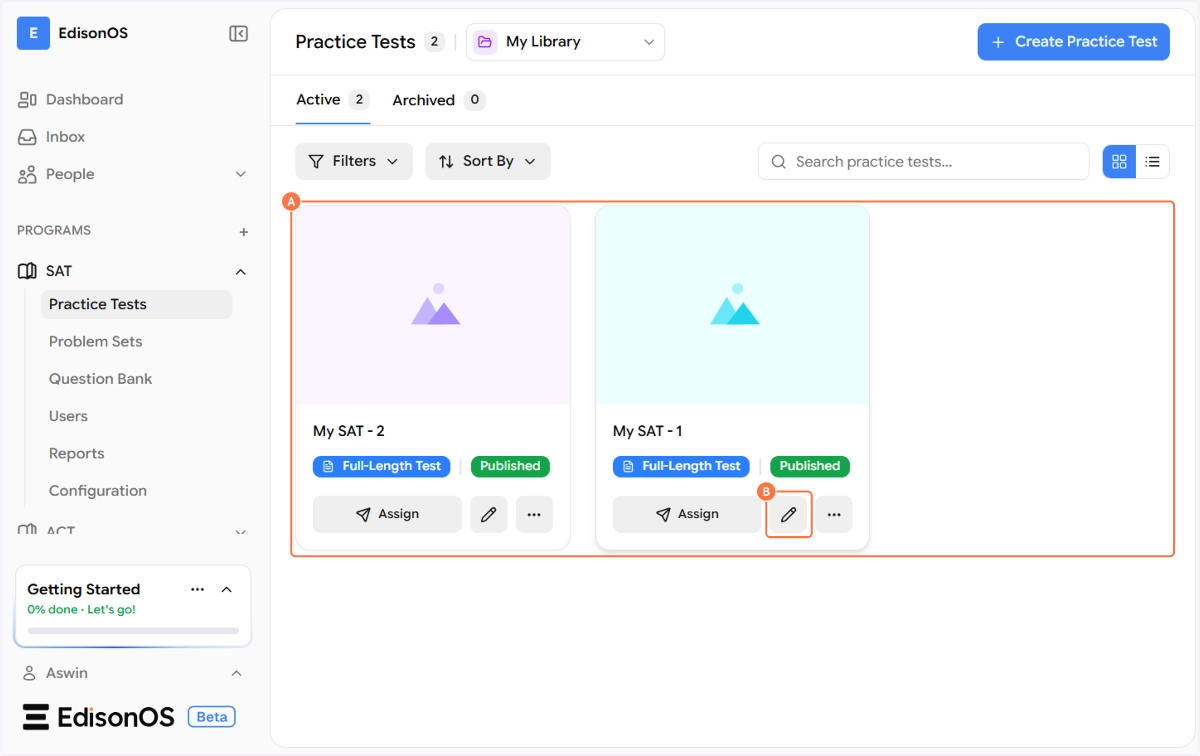
Navigate to your program (e.g., SAT) in the left sidebar and click on Practice Tests. By default, the library switcher shows the EdisonOS Library, click the dropdown and select My Library to see all the tests you've created, each showing its type (e.g., Full-Length Test, Module test) and current status (Published or Draft).
To edit a test, click the pencil icon at the bottom of the test card. This will open the test editor.
Step 2 - The Section Builder
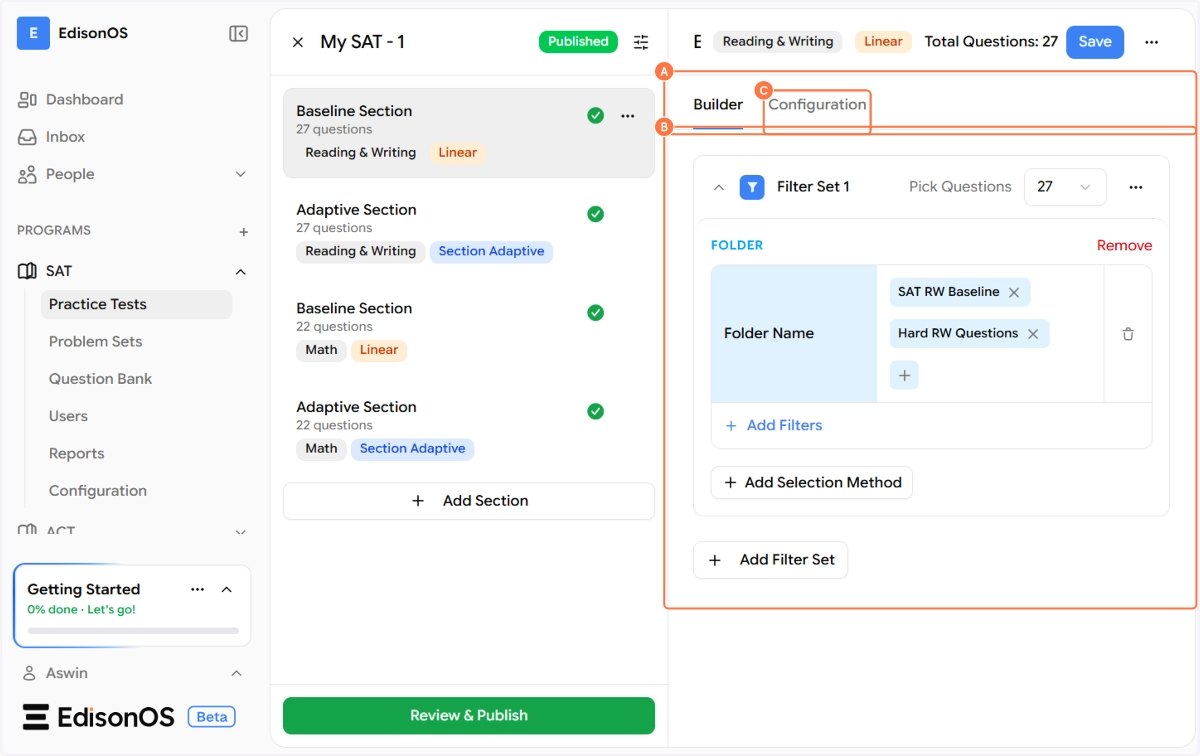
Once inside the test editor, you'll see a three-column layout:
Left panel - the list of all sections in this test
Middle panel - the section list and navigation
Right panel - the Builder and Configuration tabs for the selected section
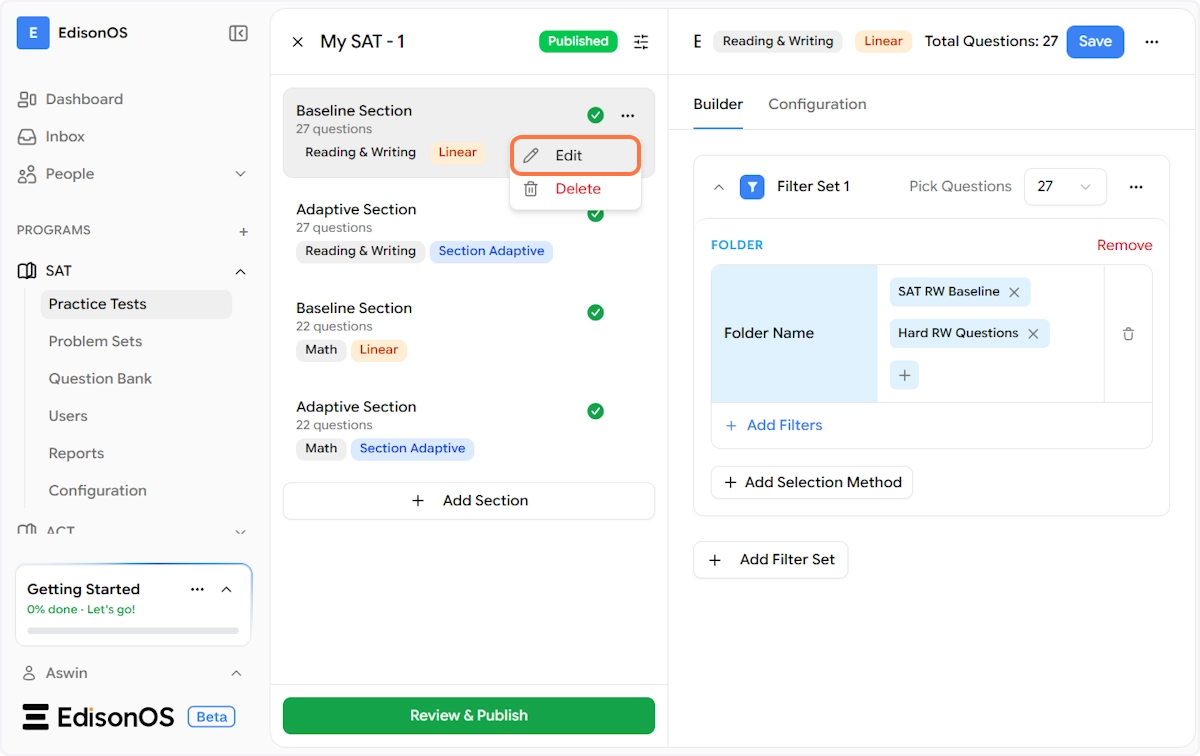
Clicking on any section in the middle panel will load its details in the right panel. The section name, module, and type are displayed in the top bar (e.g., Reading & Writing · Linear · Total Questions: 27).
📸 Add Screenshot 2 here - After revamp
The Builder tab is currently under active development. This is where you'll be able to directly build out and manage the questions within a section. We appreciate your patience as we continue to improve this experience, it will be fully available soon.
Step 3 - Configuring a Section
To configure a section, click on it in the section list to select it, then click the Configuration tab in the right panel. Each section has its own independent configuration, so changes you make here apply only to the selected section.
The Configuration panel is divided into several groups:
Instructions & Directions
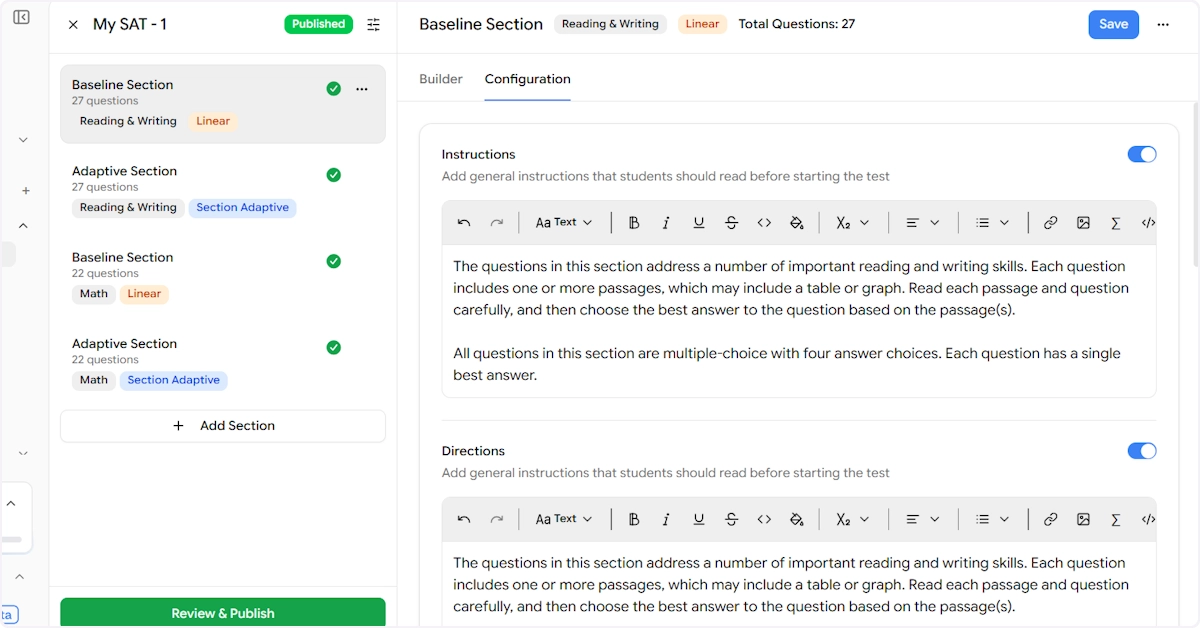
Since this is a template-based test you are editing, the Instructions and Directions are pre-filled and no need to write them from scratch.
You can either toggle them off or edit the description as needed.
Instructions – This is the general guidance that students read before starting the section. You can toggle it on or off using the switch on the right. When enabled, a rich text editor appears where you can write or paste the instruction text.
Directions Similar to Instructions, this is an additional directions field shown to students at the start of the section. It can also be toggled on or off and edited using the rich text editor.
Both fields support full text formatting including bold, italic, underline, lists, links, images, and math formulas.
Time Configuration
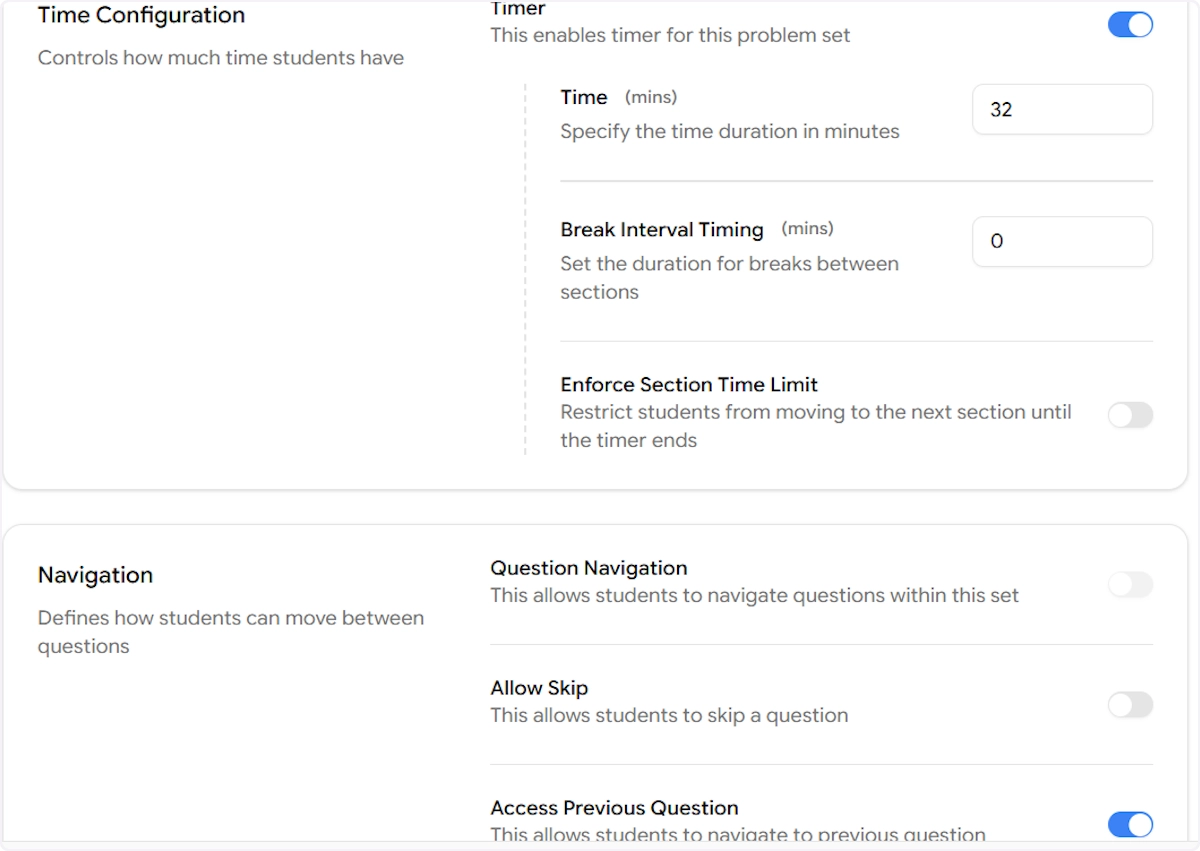
Timer Toggle this on to enable a countdown timer for this section. When enabled, you can set:
Time (mins) - The total time allowed for the section. For example, 32 minutes for a Reading & Writing Baseline.
Break Interval Timing (mins) - Set how long the break between sections lasts. Set to 0 if no break is needed.
Enforce Section Time Limit - When enabled, students cannot move to the next section until the timer runs out. This replicates strict, proctored exam conditions.
Navigation
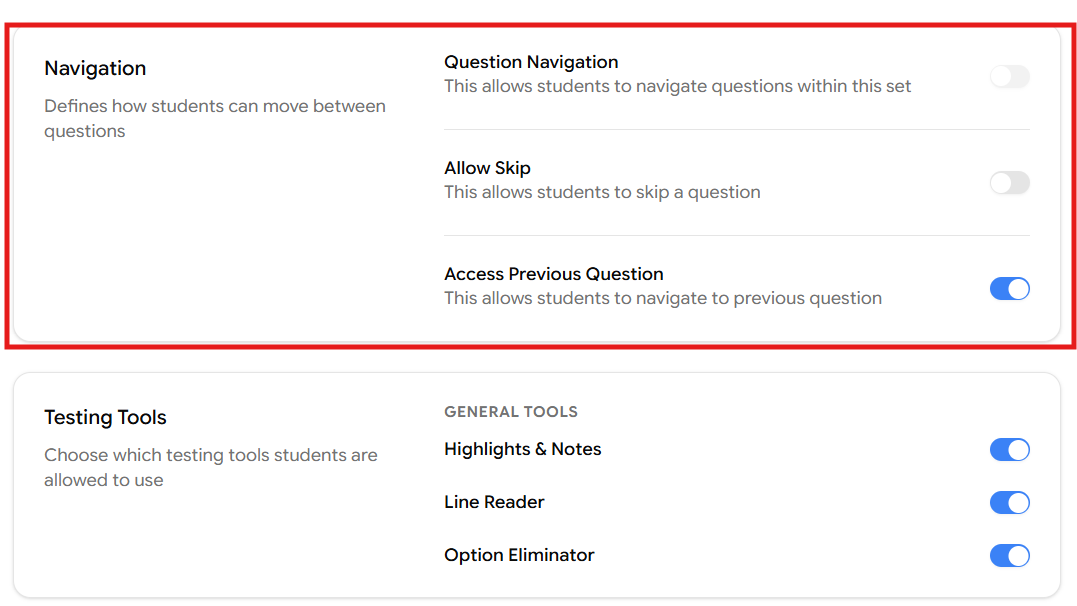
Question Navigation When enabled, students can freely jump between questions within the section rather than being locked to a linear order.
Allow Skip When enabled, students are permitted to skip a question and return to it later.
Access Previous Question When enabled, students can navigate back to a question they've already answered within the same section.
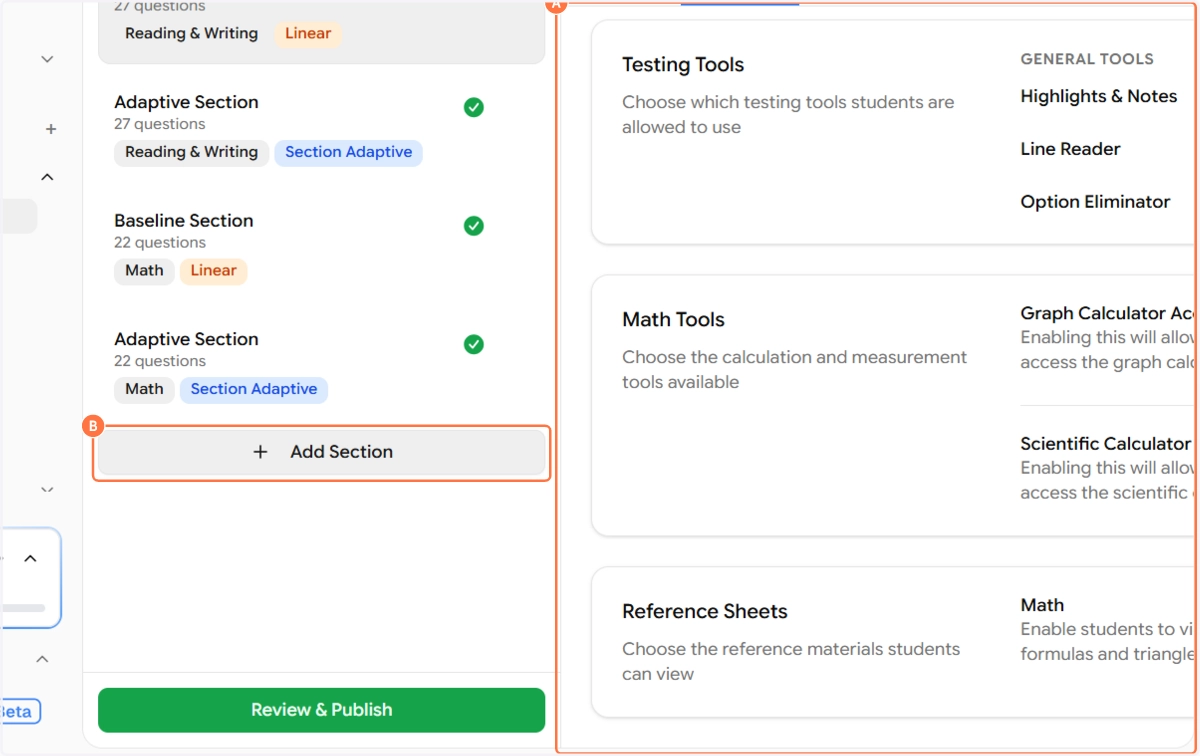
Testing Tools - For SAT Program
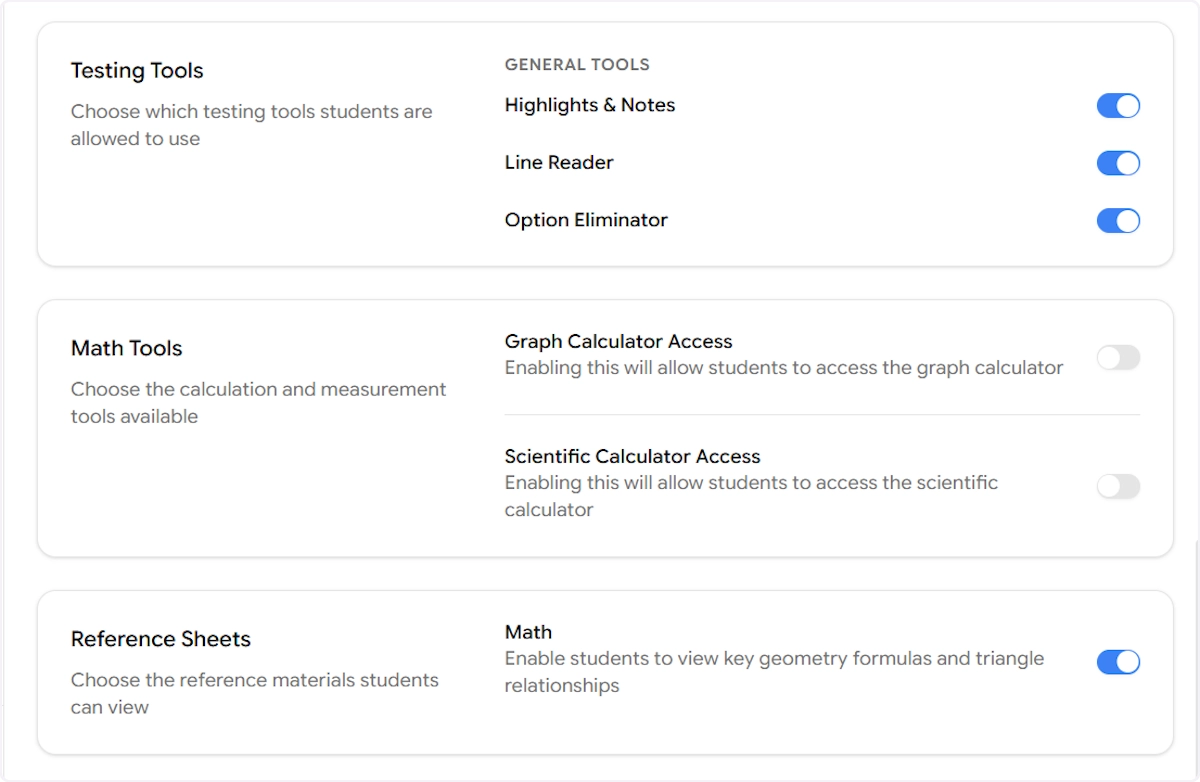
General Tools Choose which on-screen tools students can access during this section:
Highlights & Notes - Allows students to highlight text and add personal notes while reading passages.
Line Reader - A reading aid that isolates one line at a time to help students focus.
Option Eliminator - Lets students cross out answer choices they've ruled out, just like striking through options on paper.
Math Tools Control access to calculators for this section:
Graph Calculator Access - Enables an in-browser graphing calculator. Recommended for Math sections where graphing is permitted.
Scientific Calculator Access - Enables a scientific calculator. Enable this based on your test's rules for the relevant section.
Reference Sheets
Math - When enabled, students can access a reference sheet displaying key geometry formulas and triangle relationships during the section. This is standard for SAT Math sections.
Step 4 - Editing or Renaming a Section
To edit the name or type of any section, click the three-dot menu (⋯) on the section card in the middle panel and select Edit.
This opens the Edit Section modal, where you can update:
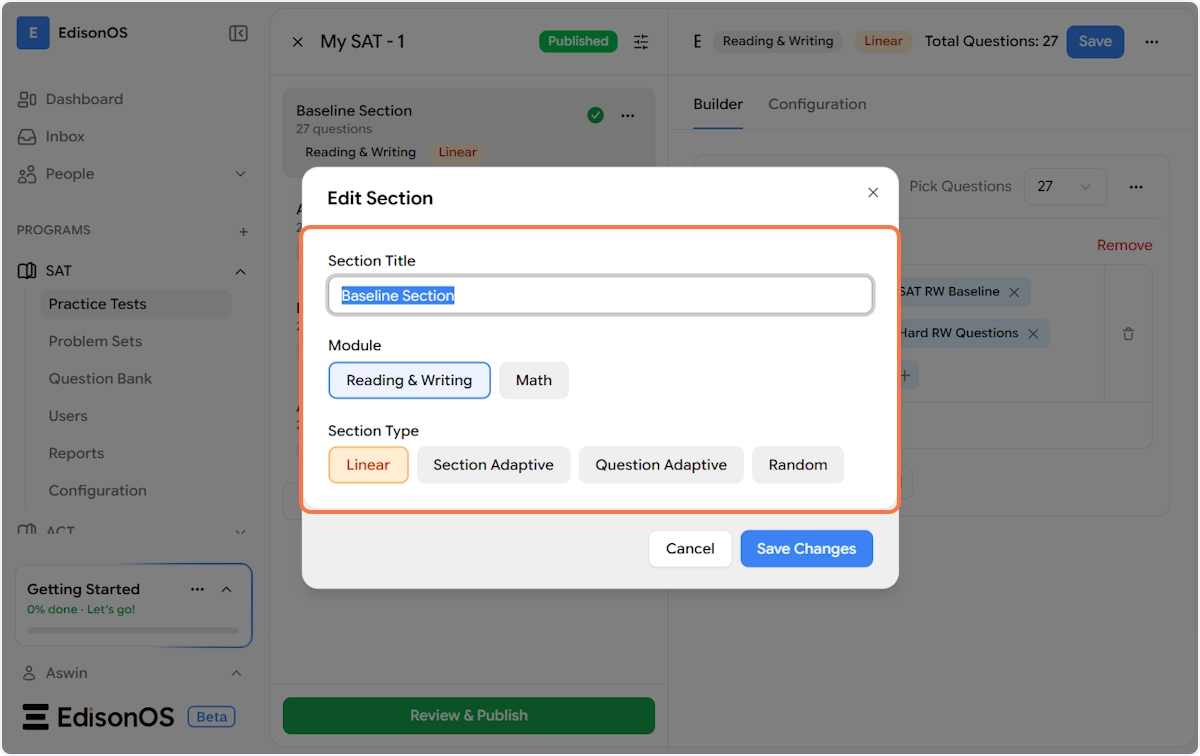
Section Title - Rename the section to anything that suits your test structure. For example, "Baseline Section" or "Reading Module 1".
Module - Switch the section between Reading & Writing and Math.
Section Type - Change how the section behaves:
Linear - Questions are presented in a fixed order, one after the other.
Section Adaptive - The section routes students to a different follow-up section based on their performance (used for the Adaptive Upper/Lower structure in Full-Length Tests).
Question Adaptive - The difficulty of each individual question adjusts in real time based on the student's previous answers within the same section.
Random - Questions are pulled and presented in a randomized order from the assigned folder.
Once done, click Save Changes to apply.
You can also select Delete from the three-dot menu to permanently remove a section from the test.
Step 5 - Adding a New Section
At the bottom of the section list in the middle panel, you'll find a + Add Section button. Click it to open the Add Section modal.
Fill in the following:
Section Title - Give the new section a descriptive name.
Module - Choose between Reading & Writing or Math.
Section Type - Select from Linear, Section Adaptive, Question Adaptive, or Random based on how you want this section to function.
Click Add Section to confirm. The new section will appear in the section list and you can immediately click on it to configure it using the steps above.
Section Count Limits
Sections cannot exceed the test-specific module section counts. No additional sections can be added beyond these limits.
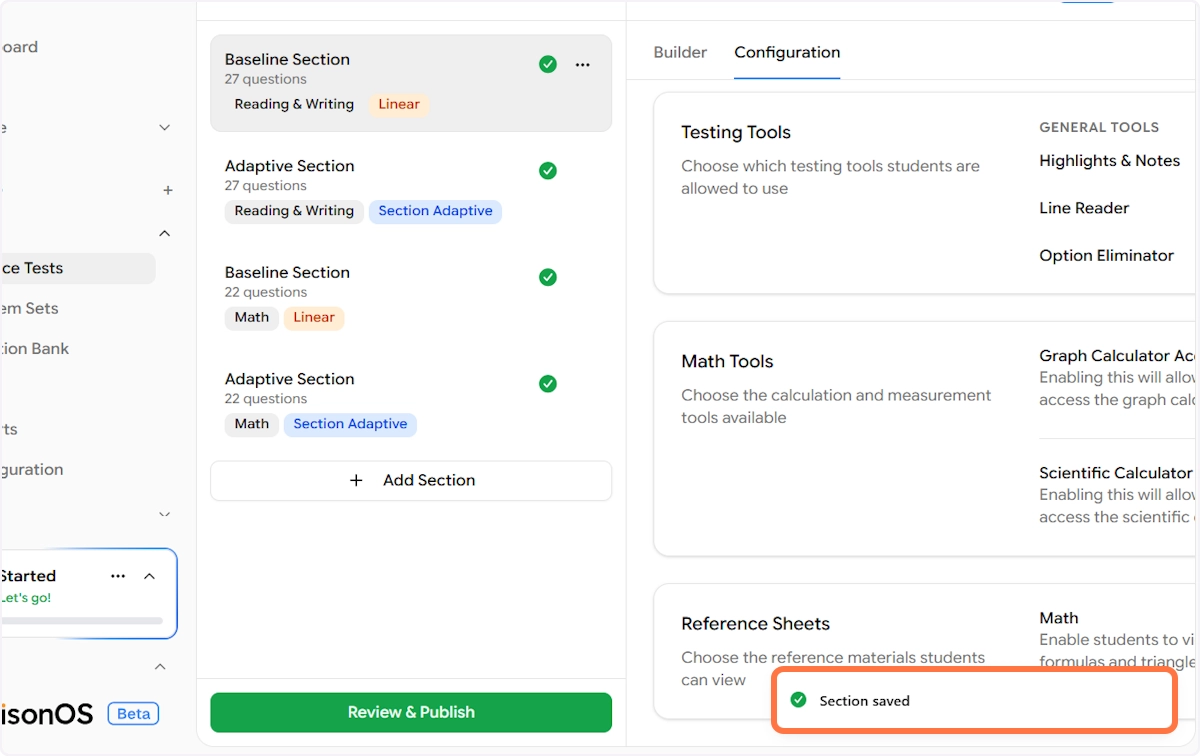
Step 6 - Save Your Changes
After making any configuration changes to a section, always click the Save button in the top-right corner of the right panel to apply your changes.

Once saved, a confirmation toast will appear at the bottom of the screen: "Section saved" — confirming that all your configuration changes for that section have been stored.
Repeat this process for each section in your test, First select the section, configure it under the Configuration tab, and hit Save. Once all sections are configured to your satisfaction, click Review & Publish at the bottom of the middle panel to make the updated test available to students.