3.10 Resources
The Resources section is where you organize and store all supplementary learning materials that support your students' practice reference PDFs, formula sheets, video links, study notes, spreadsheets, and more. Resources are grouped into Collections, which can later be shared with students to give them everything they need in one place.
Navigate to Resources
In your program (e.g., SAT), click Resources from the left sidebar. If nothing's been added yet, you'll see "No collections yet."
Switch Between Libraries
Use the library switcher at the top of the Collections panel:
EOS Library - Pre-built collections curated by EdisonOS (Read-Only)
My Library - Your academy's private collections.
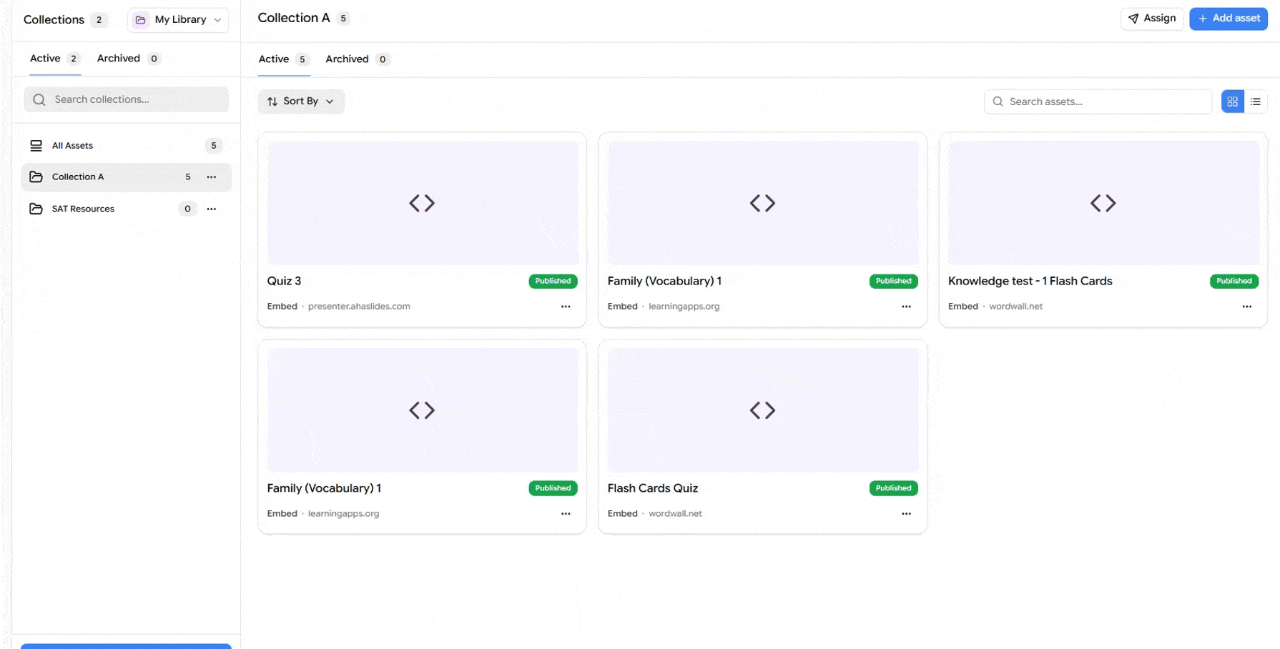
Create a Collection
Switch to My Library and click + New Collection.
Fill in:
Name - A clear title (e.g., "SAT Resources").
Description (optional) - A short note on what's inside.
Tags (optional) - For easier filtering later.
Click Create collection.
Add Assets
Open a collection and click + Add asset. Choose any type you can mix freely within one collection.
Type | Use For |
|---|---|
Guides, formula sheets, handouts | |
Image | Diagrams, charts, scanned notes |
Link | External URLs |
Doc | Word documents |
CSV | Structured data, vocab lists |
Excel | Spreadsheets, score charts |
Text note | Quick notes written in-platform |
Embed | Using Iframe YouTube, Vimeo, Google Docs, etc. |
Assign a Resource to Students
Once you've added assets to a collection, you can share the entire collection with students in a single action there's no need to assign each asset individually. Assignment happens at the folder level, so every asset inside it (PDFs, links, embeds, notes, etc.) becomes available to the selected students at once.
Student View
Once assigned, students will see the collection inside the Resources tab of their dashboard the next time they log in. They can open any asset in the collection preview PDFs, click external links, watch embedded videos, or download materials without needing any extra permissions.
The collection remains visible to the student until you revoke access from the same Assign dialog.
Manage Collections
Each card shows the collection name and asset count. Click the three-dot menu (⋯) to rename, edit, or archive.
Active tab - Live collections.
Archived tab - Hidden from students, restorable anytime.
Once ready, share collections with students or attach them to cohorts, problem sets, or practice tests.