2.3 Email Mapping
Authenticate a domain you own so emails go out from your academy's address instead of the default EdisonOS sender. Once a domain is verified, every email your academy sends invites, reports, notifications can come from a "from" address your students and parents already recognize and trust.
Find this under Academy Settings → Email.
Why authenticate a domain
By default, EdisonOS sends email from no-reply@edisonos.com. That works out of the box, but recipients see EdisonOS as the sender rather than your academy.
Authenticating your own domain lets you:
Send from an address on your own domain (e.g.
no-reply@youracademy.com)Build trust and recognition because recipients see your brand, not EdisonOS
Improve deliverability, since authenticated domains are less likely to land in spam
Until you authenticate a domain, the Sender preview will continue to show the default sender: EdisonOS <no-reply@edisonos.com>.
How it works
EdisonOS walks you through three steps:
Enter a domain you own. You'll need DNS access at your registrar to complete setup.
Publish the three CNAME records we show you. Propagation usually completes within an hour, though it can take up to 24.
EdisonOS re-checks every minute and verifies the domain once the records are live. Then you pick the address email sends from.
Step 1 - Enter your sending domain
In the Domain field under Sending domain, type the bare domain you want to send from for example, brightpathacademy.com.
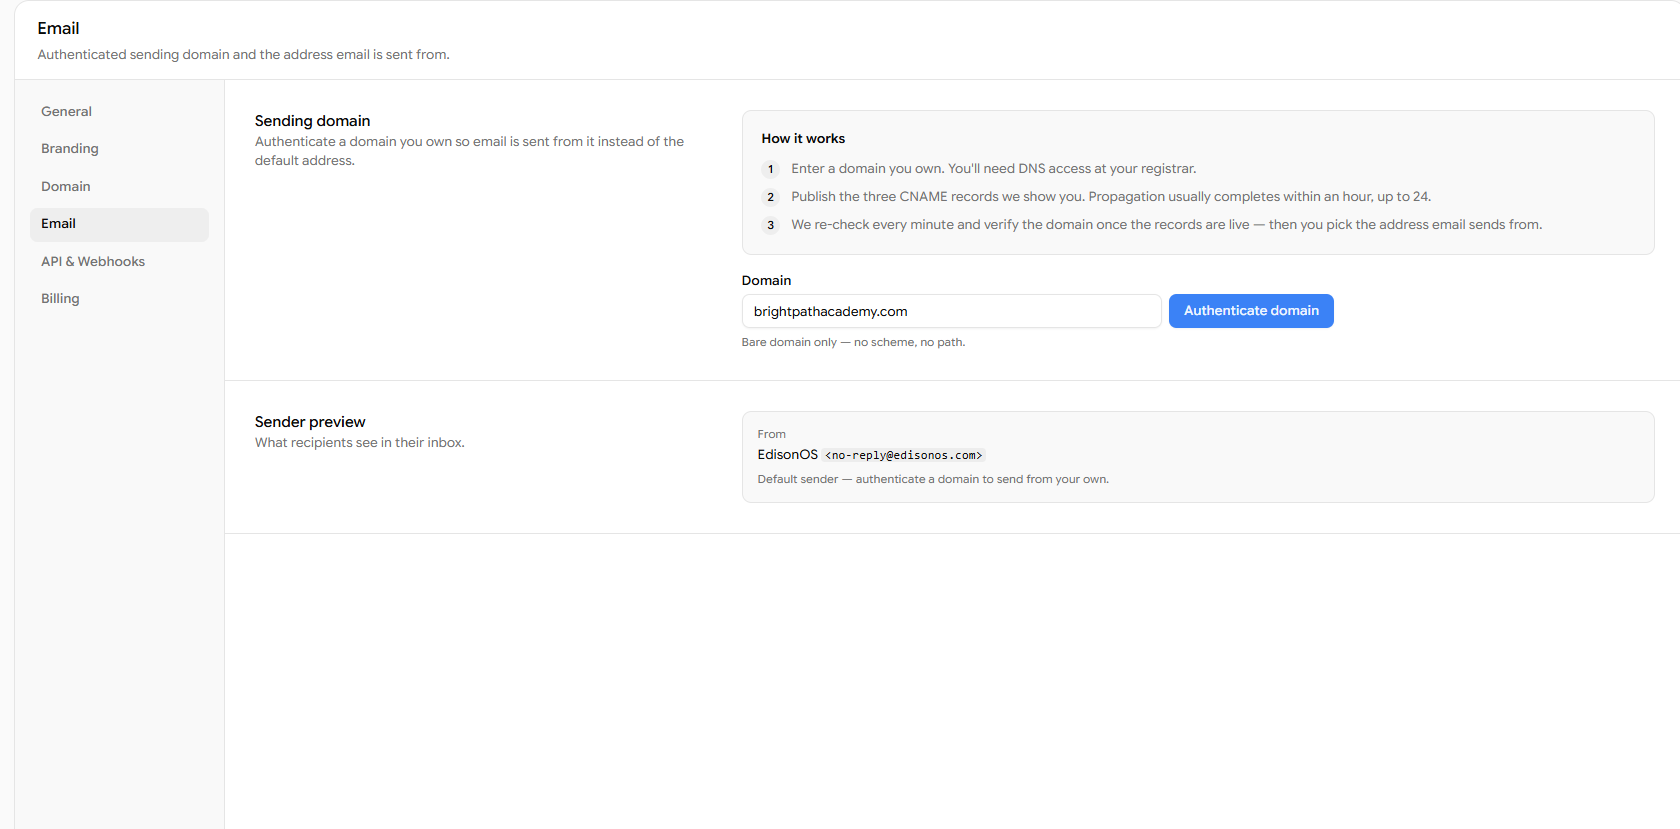
Bare domain only - no scheme, no path. Enter youracademy.com, not https://youracademy.com or brightpathacademy.com/. The form rejects schemes and paths.
Click Authenticate domain to continue.
Step 2 - Publish your DNS records
After you submit your domain, EdisonOS displays three CNAME records. These prove you own the domain and authorize EdisonOS to send mail on its behalf.
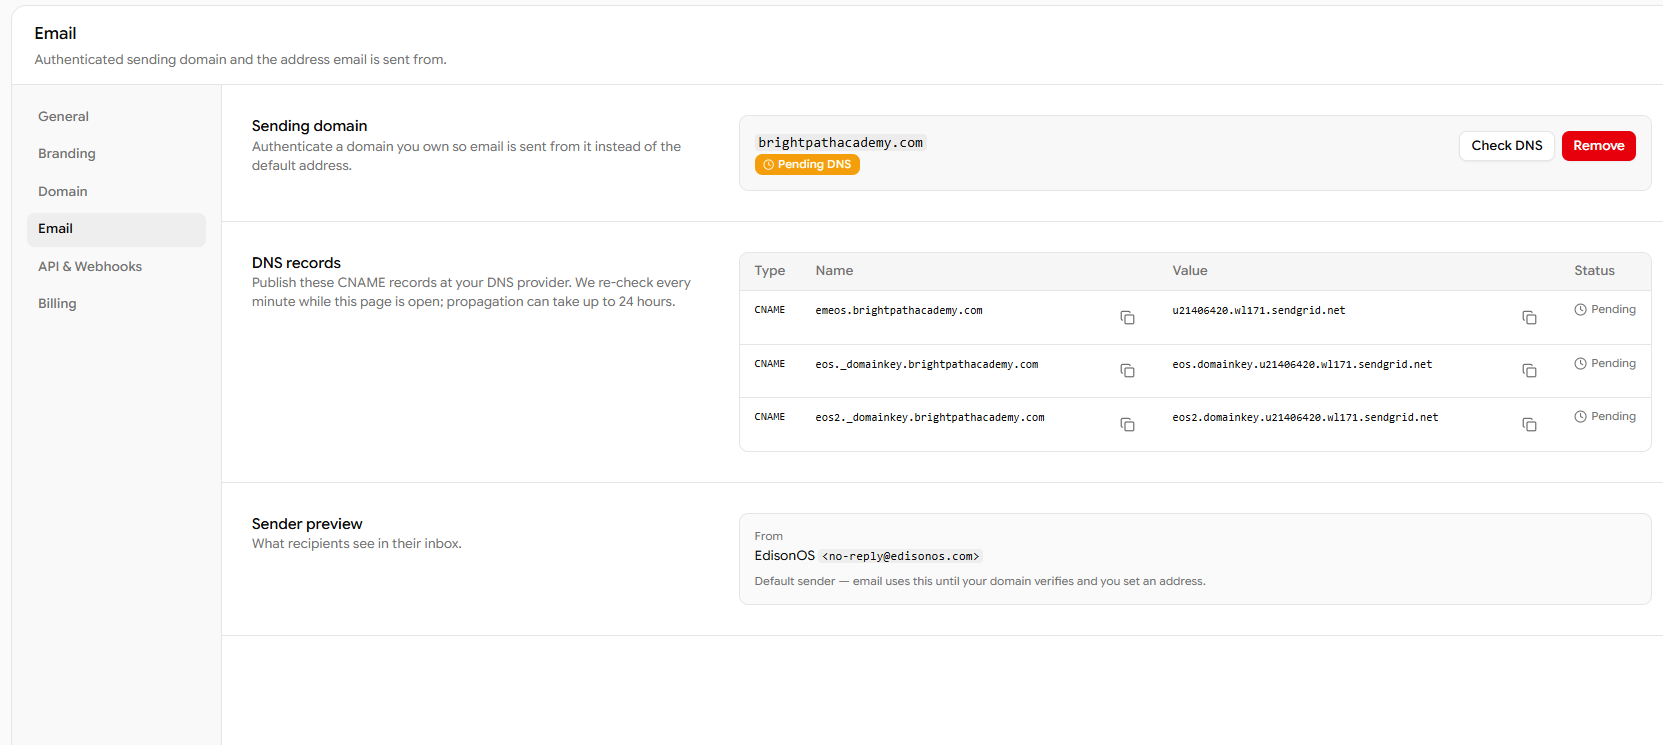
Log in to your domain provider (e.g. GoDaddy, Namecheap, Squarespace, etc.), open the DNS management section, sometimes labeled DNS Records and add each of the three records under Type: CNAME, copying the Name and Value for each one exactly as shown.
The exact steps for adding DNS records differ from one provider to another. If you're unsure where to find DNS settings or how to add a record, refer to your domain provider's own help articles, most have step-by-step guides for adding a CNAME record:
Namecheap - see their knowledgebase guide on "How to create a CNAME record"
Squarespace - see their help guide on "Adding custom DNS records"
Cloudflare, Google Domains, and others - look for "Add a CNAME record" in their documentation
A few notes:
Don't modify the values. Even a small typo will cause verification to fail.
Propagation can take up to 24 hours, though it's often much faster.
Keep the EdisonOS page open while you wait, it re-checks every minute automatically.
Step 3 - Verify and pick your sender
Once your CNAME records are live, EdisonOS checks them automatically every minute. If you'd rather not wait for the next automatic check, click Recheck DNS to verify your records on demand.
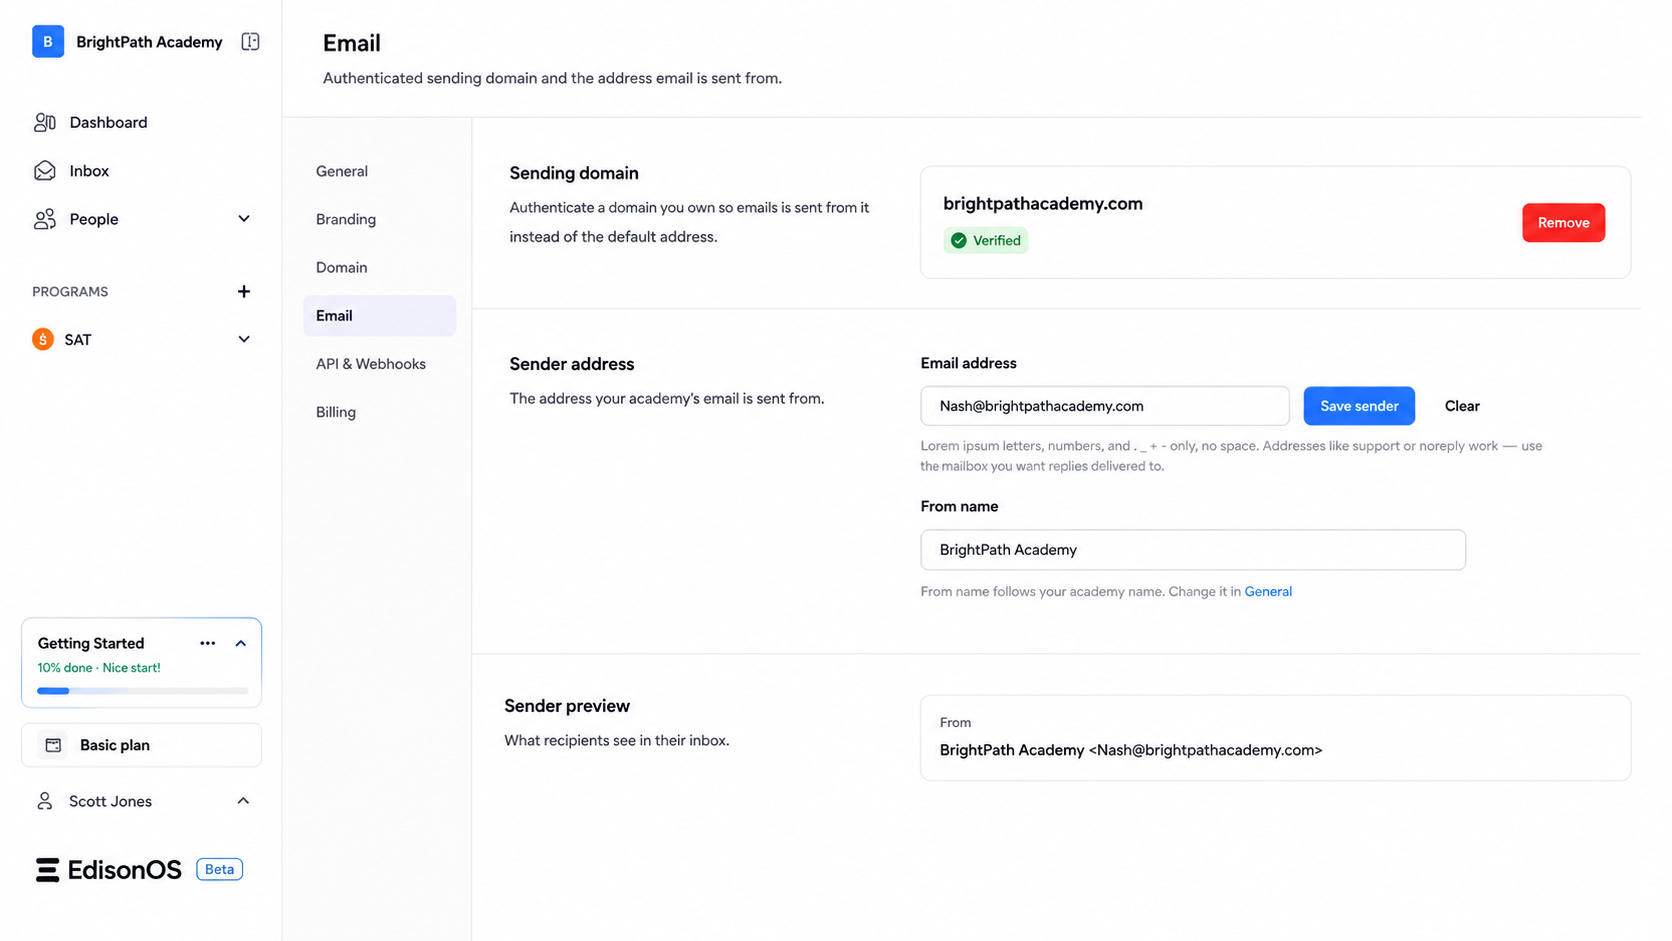
After verification succeeds, choose the exact address you want email to send from (for example, nash@brightpathacademy.com or support@brightpathacademy.com). The Sender preview updates to reflect your new authenticated sender.
Troubleshooting
Records not detected yet. DNS propagation can take time. If EdisonOS hasn't picked up your records after a while, confirm at your DNS records that all three CNAME records were saved and that the Name and Value fields match exactly what EdisonOS displayed.
Verification failed. The most common cause is a mismatched or partially copied record. Delete and re-add any record where the value doesn't match, then click Recheck DNS to verify again.
Still on the default sender. Until a domain is fully verified, email continues to send from no-reply@edisonos.com. This is expected, the default sender stays active so your emails keep going out while you complete setup.