
7.2 Invitation Links
An invitation link is a shareable URL that grants access to a specific test. Instead of selecting students one by one, you generate a single link and distribute it however you like, over email, chat, a class group, or a landing page. Each person who opens the link provides their own details and begins the test, and EdisonOS handles enrollment behind the scenes. This makes invitation links ideal for collecting leads or opening a test to students who aren't enrolled yet.
When to Use Each Method
When you assign a test, EdisonOS asks how you want to assign it, and gives you two options:
Option | When to use it |
|---|---|
Assign to My Students | Assigns the test to students who are already enrolled on your platform. You pick them by name or email (or assign a whole group). This method is covered in full in the Assigning a Practice Test article. |
Assign via Invitation Link | Creates a shareable link for bulk distribution, ideal for leads or students who are not yet enrolled. Anyone with the link can attempt the test. This article covers this method in detail. |
The rest of this article walks through the invitation-link method step by step.
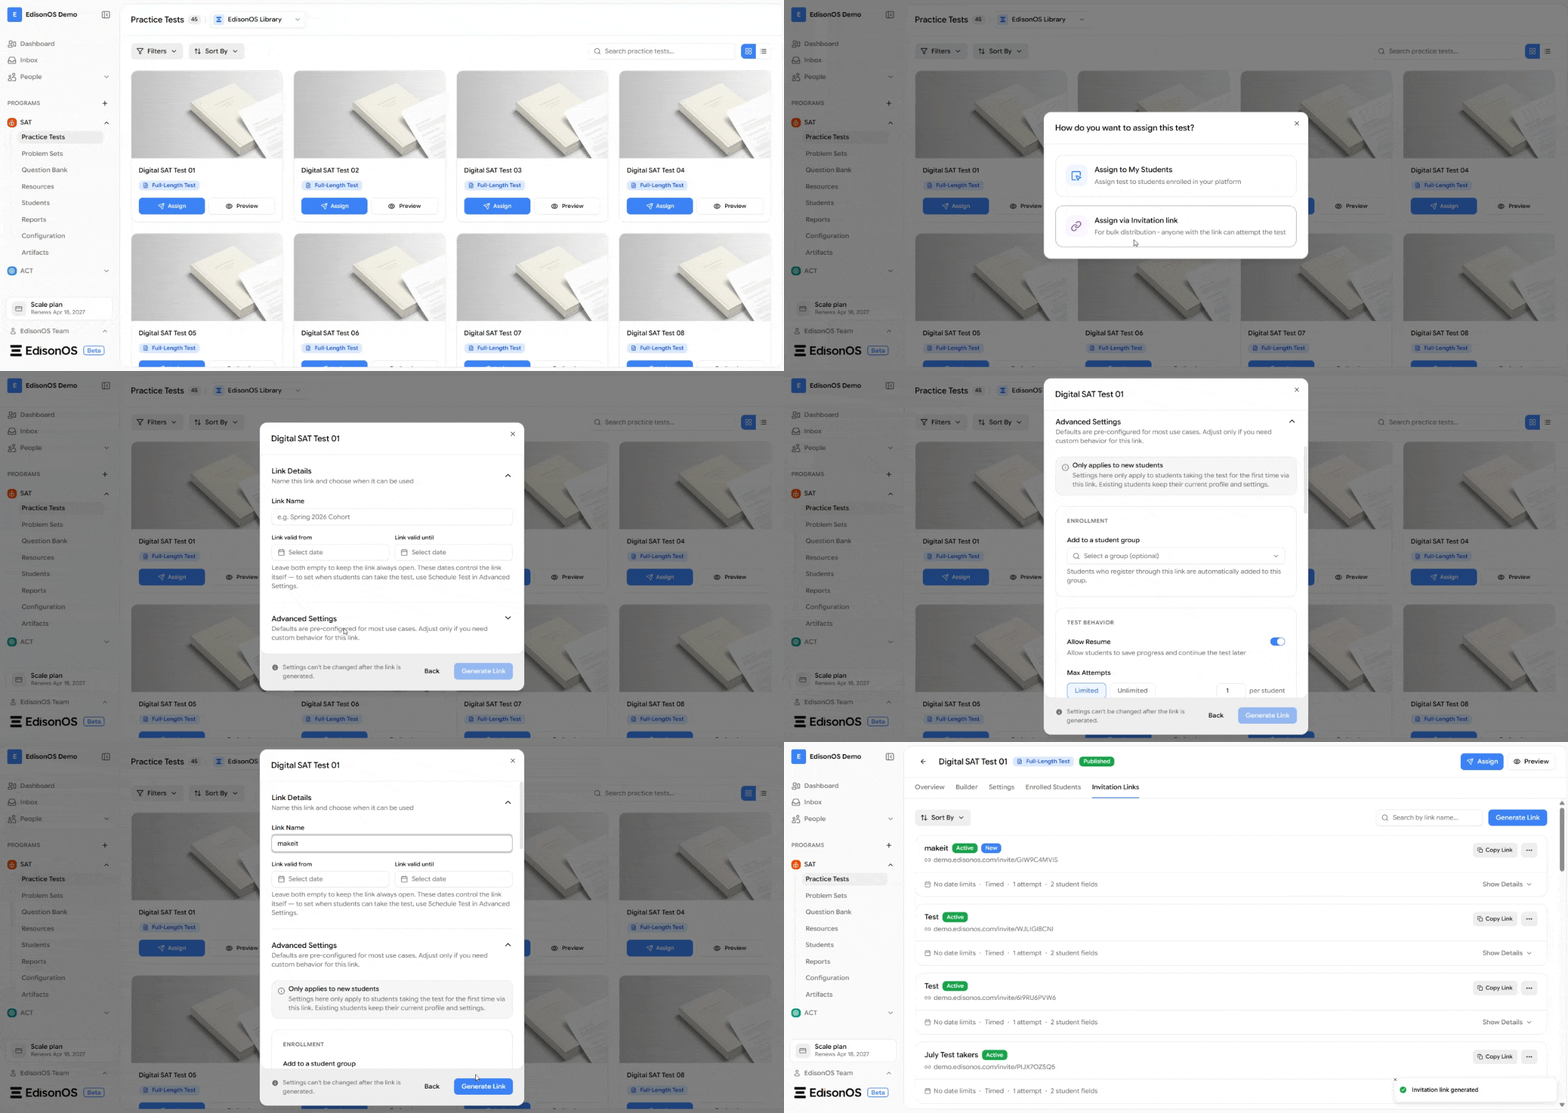
Step 1: Open the Test and Start the Assignment
From the left sidebar, click on your Program (e.g., SAT, ACT).
Click Practice Tests and locate the test you want students to take.
Click the Assign button below the test card.
Step 2: Choose Assign via Invitation Link
When the How do you want to assign this test? dialog opens, select Assign via Invitation Link. This is the option to use for bulk distribution and for students who are not yet enrolled, anyone with the link can attempt the test.
Step 3: Add Link Details
The dialog opens on the Link Details screen, where you name the link and choose when it can be used:
Enter a Link Name to identify this link (e.g., diagnostictest).
Set Link valid from and Link valid until dates to control when the link can be used. Leave both empty to keep the link always open.
These dates control the link itself. To set when students can take the test, use Schedule Test in Advanced Settings (Step 5).
Below this you'll find the Advanced Settings section. The defaults are pre-configured for most use cases, adjust them only if you need custom behavior for this link.
Step 4: Add Students to a Group (Enrollment)
Expand Advanced Settings. At the top you'll see a reminder that these settings only apply to new students, students taking the test for the first time via this link. Existing students keep their current profile and settings.
The first section is Enrollment, where you can automatically place new registrants into a group:
Use the Add to a student group dropdown to select a group (optional).
Students who register through this link are automatically added to the group you choose.
A group holds a set of students along with the tutor assigned to them, so assigning the link to a group means every new registrant is placed under that group and its tutor in one step, no need to enroll or group them individually. To learn more, refer to Managing Groups & Tutors.
Step 5: Configure Test Behavior
In the Test Behavior section, control how students take the test:
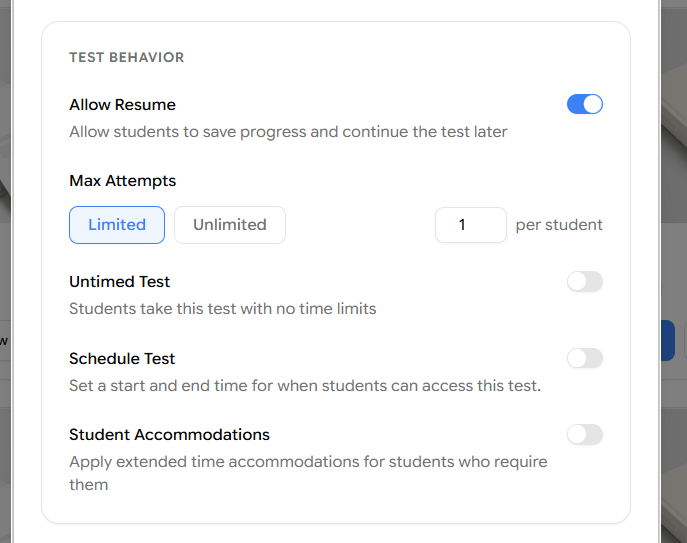
Setting | What it does |
|---|---|
Allow Resume | Allows students to save progress and continue the test later. |
Max Attempts | Set Limited (then enter a number, e.g., 1 per student) or Unlimited retakes. |
Untimed Test | Students take this test with no time limits. |
Schedule Test | Set a start and end time for when students can access this test. |
Student Accommodations | Apply extended time accommodations for students who require them. |
Toggle each setting on or off based on your preference.
Step 6: Set Post-Submission Behavior
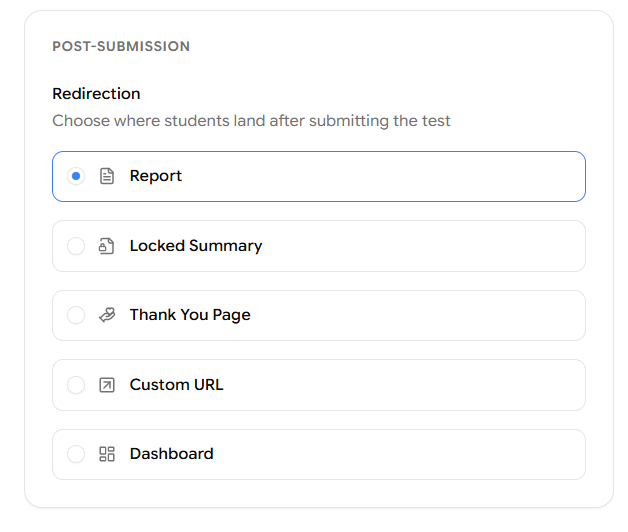
In the Post-Submission section, choose where students land after submitting the test:
Option | What students see |
|---|---|
Summary Page | A detailed test summary screen showing their results after completing the test. |
Locked Summary | A minimal summary that stays basic and does not include all the reports. |
Thank You Page | A custom thank-you message that you can set. |
Custom URL | Redirects students to a web address you specify. |
Dashboard | Sends students back to their EdisonOS Student dashboard. |
Step 7: Choose the Student Details to Collect
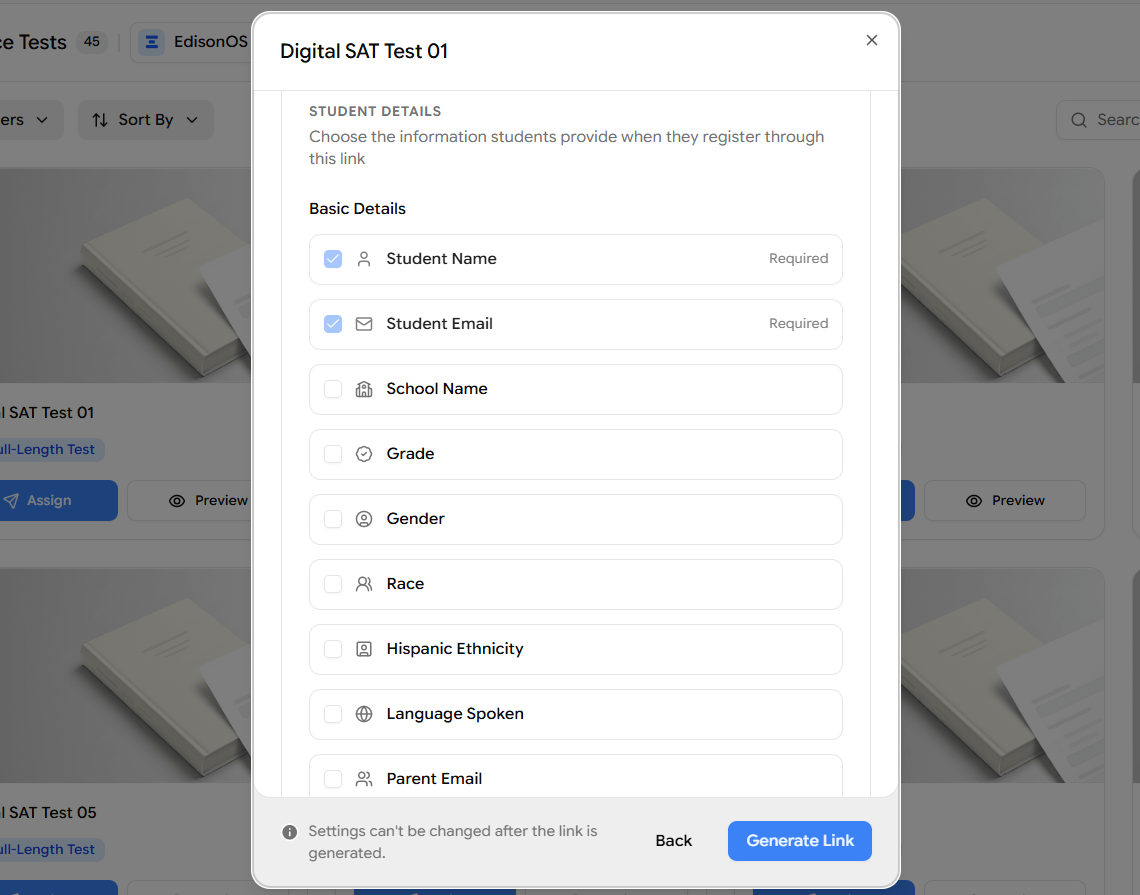
In the Student Details section, choose the information students must provide when they register through this link. This is especially useful for capturing lead information from students who aren't enrolled yet.
Basic Details includes fields such as:
Student Name (Required)
Student Email (Required)
School Name
Grade
Gender
Race
Hispanic Ethnicity
Language Spoken
Parent Email
Scroll down to the Academic Goals section to optionally collect goal-related information:
Baseline Score
Target Score
Target Test Date
Target School
Check the box next to each field you want students to fill in during registration.
Step 8: Generate and Share the Link
Once you have specified the link details, enrollment group, test behavior, post-submission behavior, and the student details to collect, click Generate Link in the bottom-right corner.
Settings can't be changed after a link is generated. You can, however, create multiple links for the same test, each with different behavior, for different purposes.
A confirmation toast appears (Invitation link generated), and you land on the Invitation Links tab, where all generated links for this test are listed. For each link you'll see its name, status (e.g., Active), the invite URL, and a quick summary of its settings, such as date limits, timed/untimed, number of attempts, student fields collected, and the assigned group (e.g., Group: Partner A). Click Show Details to expand any link, or use the ⋯ menu for more options.
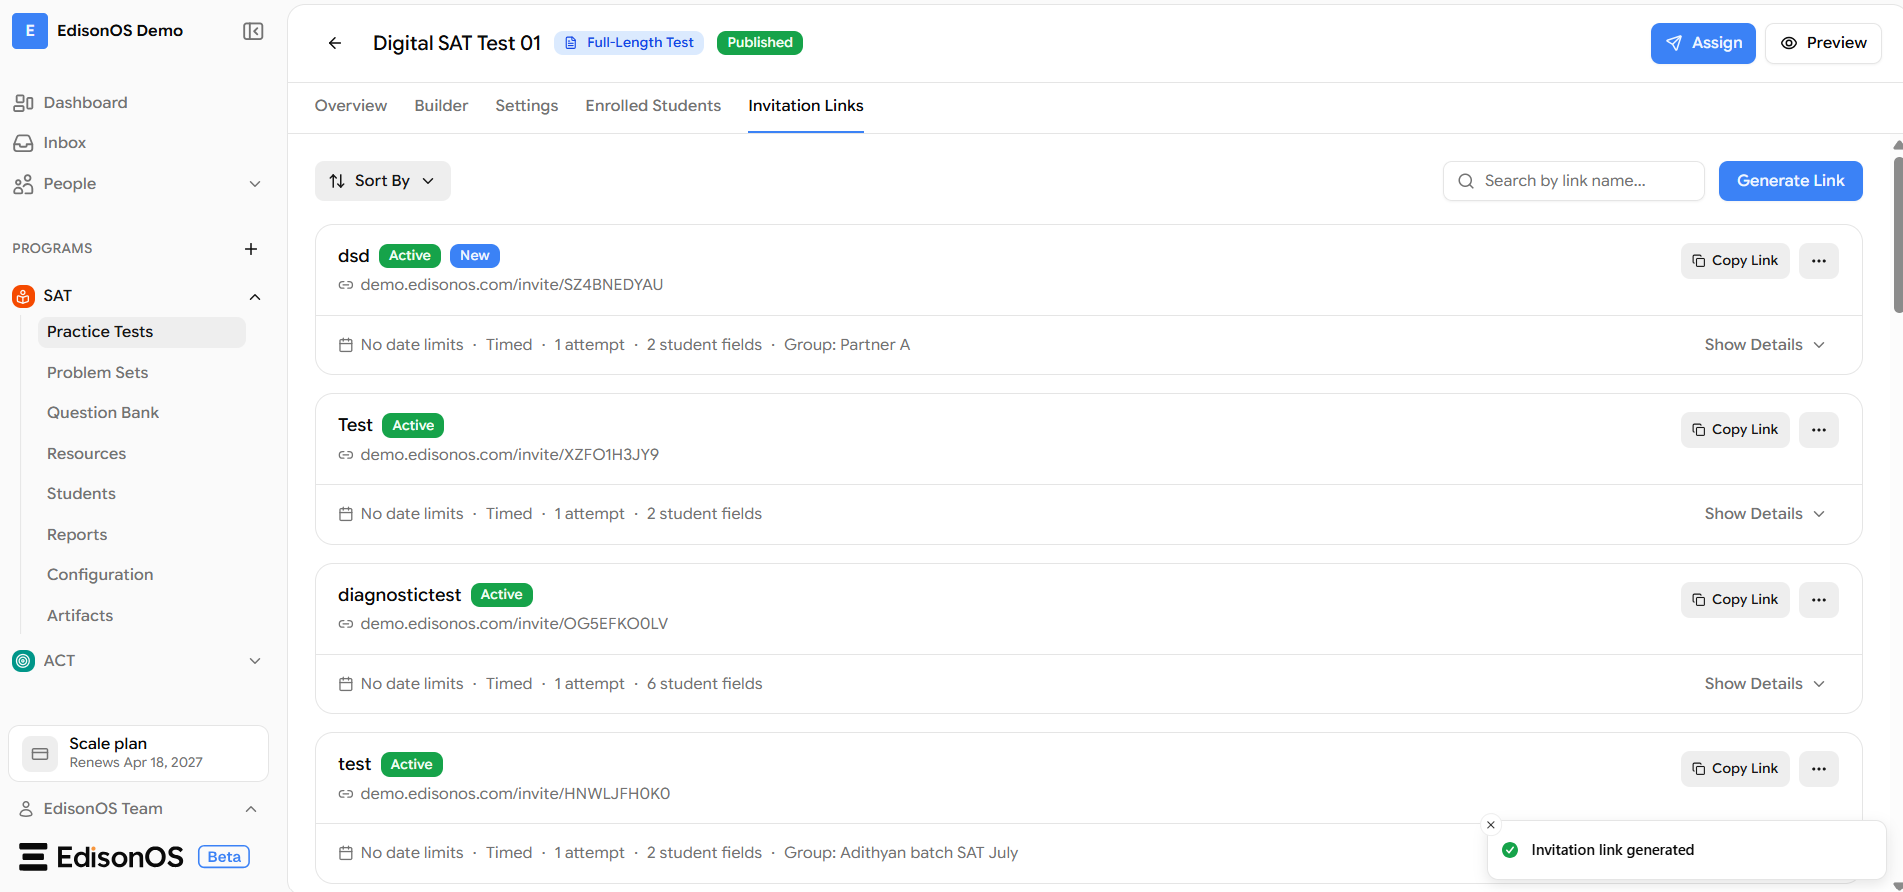
To share a link, click Copy Link next to the one you want and send it to your students. They can then register and take the test.
What Happens on the Student's Side
When a recipient opens the invitation link:
They are prompted to enter the details you configured in Step 7 (at minimum, name and email).
Summary of the Full Flow
Program → Practice Tests → Click Assign → Assign via Invitation Link → Add Link Details → Add to Student Group (optional) → Configure Test Behavior → Set Post-Submission Behavior → Choose Student Details to Collect → Generate Link → Copy Link from the Invitation Links tab → Share with students → Student registers → Takes the test